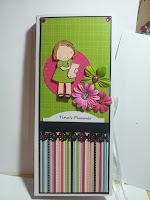
For the last group, I don't have a pic of the original desk planner to show you. My friend sent me a copy of it, but it doesn't show up that good, but with all the others, I know you get the idea! Speaking of the last group, can you believe how good the store bought list pad goes with the scrapbook paper colors? That happened again on the group right above this one. I was almost to the making of the last planner before I realized I should be showing you some pics of the steps I took to make one. So, as I was making the last one, which is actually, the 2nd to last grouping shown above, I took a few pics to give you some insight!
 This pic shows how I scored a strip to hold the pen (also got at Dollar General!), and added red liner tape on the edge of each score line. By the way, the planner is 9 x 8 1/2 inches. With the scoring on the 8 1/2 inch length.
 I added a pretty heavy piece of chipboard to the backside of the memo pad, again with the red line tape.
 Adding more red line tape to secure it to the inside right panel of the planner. On the left panel side, I added a piece of white cardstock so that side would appear more finished. On top of that is where the panels with the pockets are that you see in the group of pics.
 I punched with a Martha Stewart floral border punch and trimmed these pieces down to 1 inch total to be added to the top of the inside pockets as well, as the top of the bottom panel on the front.
 This shows how the inside pockets were made. Yes, I used Foam Tape! The scotch tape you see in the pic is how I attached the above strip to the stripe panel, as I wanted it to be just at the top of the panel.
 I got the original idea here. But, I changed mine so that I could have two pockets instead of one, and mine would hold a pen. I have to say, they were not difficult at all to make, and when I got to the adding the flowers and the baubles, I was in pure heaven!
Thanks for sticking with me in enduring such a long blog post. I will be back tomorrow to show you a new Christmas card creation that I worked on yesterday. Which is good, but bad too, because I should be working on the kits for my Treat & Tag class that I have to have ready by Wed.! Yikes ... better get to it!
Happy Stamping!
Tina


No comments:
Post a Comment
Thanks for leaving a comment! You made my day!