Saturday, February 25, 2012

Saturday's Sketch Share!

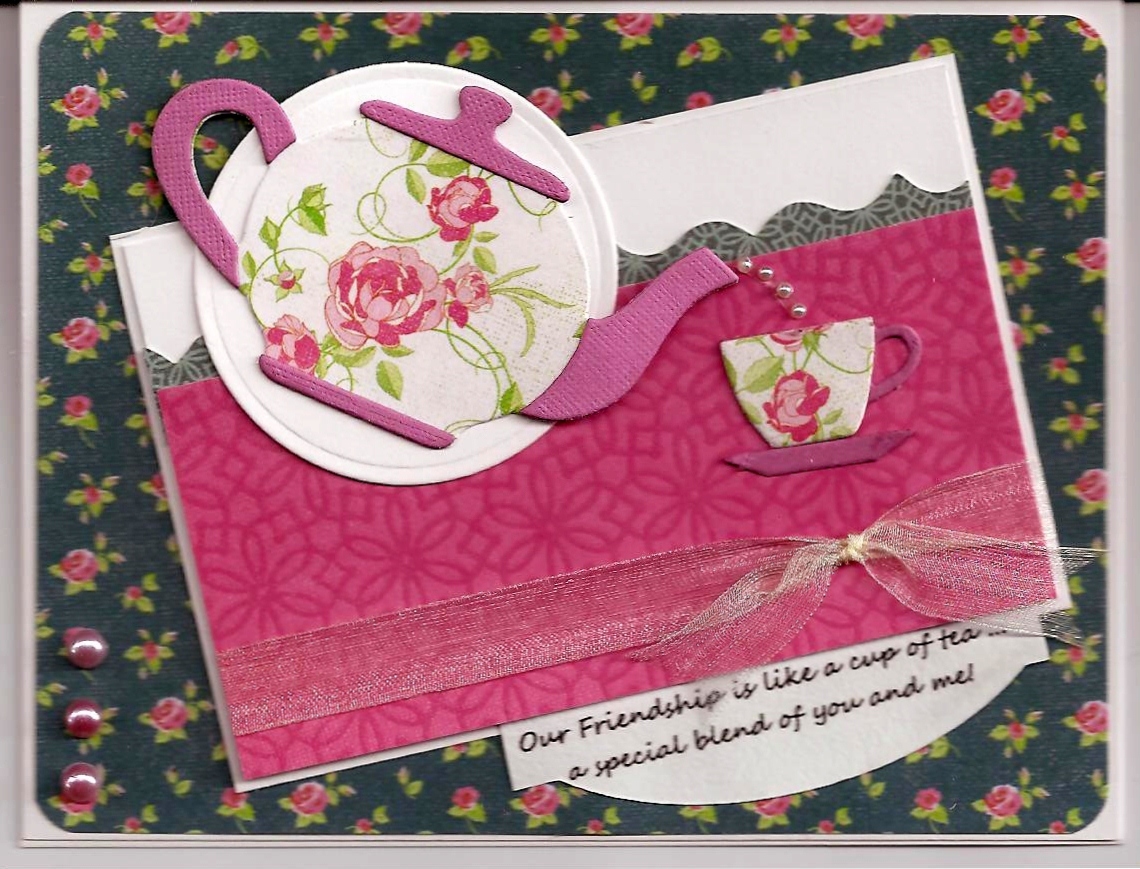
Hello!  I bet you have been wondering ... where the heck is she?  It is always crazy busy for me on the weeks that that I prepare my class kits for the classes at The Crafty Scrapper.  Now, I am not complaining, because I love my teachin' gig, but it does take away my free creative time.  Because, it seems that after I spend two solid days working on the kits, and teaching two days, I am just not in the mood.  However, I did meet up with a friend yesterday to help her with cards that will get sent to the troops.  The only card I did create in my shack was for today's share.  So, I do have that for you.  Let's get to it!  I will show you my card and then Debbie's card, and of course, the sketch we both used.  Enjoy! 


My Card

Debbie's Card
The Sketch
I really like this sketch.  These slanted panels have really grown on me!  The images that Debbie and I both used are very tall, slender images which made it perfect for the sketch.  I love them both this week, don't you?

I know I gave you my spill at the top of why you haven't seen me this week, but I have to tell you that trend is probably going to continue.  Because in one week from today, my hubby, Gary and I are off on a cruise!  And we are driving to New Orleans to get on the ship.  Between Sunday and about Wednesday of this next week, I have to make class samples for my class at the end of March.  On Thursday, we will be driving 3 hours each way to drop off our doggies (Chihuahua & a Pom) at his daughter's house, as she will be keeping them while we are gone.  So, hopefully, I will get to do a post for you early in the week to show you the card samples.  There will no interruption in the Saturday's sketch shares, as we are doing our exchanges for the next two weeks early and I will write the posts before I leave to show up on both of the Saturdays that I am gone.

Have a good weekend!
Happy Stamping!
Tina

Saturday, February 18, 2012

Saturday's Sketch Share!

Hello!  I am back with another sketch share.  This is Donna's week to participate so you get three looks with one sketch.  Let's get right to it!  I will show you my card, Donna's card, Debbie's card, and the sketch we all used.  Enjoy!

My Card
Donna's Card
Debbie's Card

The Sketch
When we send our cards to each other, we make comments to each other about how we liked the sketch or possibly changes that we made with our cards.  This week, the comments included how Donna and I both  had to add a sentiment panel because words were needed on the front, and Debbie's comment was that she left the ribbon off of hers as to not cover up the image on the paper.  Now, I think those additions or reductions made our cards better, than without the changes!  Don't you?  I love how they all came out and it will be a sketch to remember since it seems like so many sketches are vertical instead of horizontal like this one!  What do you think of the cards?

Have a great weekend.  Monday and Tuesday of next week, I will be doing my class kits preps.  But, who knows, maybe I'll get in my room this weekend, so I can have new things to show you. 

Happy Stamping!
Tina

Friday, February 17, 2012

Hello Sweet Friend!

Hello!  The month is half over and I realized I had not done February's Sketch For You to Try challenge yet, so I figured I had better get to it!  Next week, I will be working on my class kits and I was thinking I might not get another chance to get this one done.  Remember earlier this week, you saw one of the Benton Bear sets from Inky Antics, well, today I am using another one of the sets.  And, went with a cupcake paper I got for the Valentine holiday but didn't get to use.  Here is my card.  Enjoy!


And the sketch:


I am thinking I love this sketch!  And I love my card ... so cute?  Thoughts?

Recipe:
Paper - Doodlebug Designs Sweet Cakes Line: both sides of Baby Cakes, Cardstock White
Stamps - Inky Antics Pampered Benton
Ink - Copics (shhh! ...don't tell anyone because I am not blending, I am just coloring when I have the right colors for my project, like today's!) 
Tools - Spellbinders Circles
Other - Rhinestones, White Glaze Pen, Quicky Glue Pen, Art Institute Magnolia Transparent Glitter

I will see you tomorrow for the Saturday sketch share. 
Happy Stamping!
Tina

Thursday, February 16, 2012

Amazing Grace!

Hello!  I have a card to show you that I made and sent to a friend.  Her husband is having some medical issues and I wanted her to know that I was thinking of her.  I actually made the card on Sunday with a sketch that I found with a Sunday night challenge deadline.  I knew I would not be showing you in time to get in on the challenge, but I thought the sketch was perfect for my card, so I used the sketch anyway.  It is a great sketch and one I think I will do again.  Let me show you my card.  Enjoy!


I don't know if you can see it, but behind the words I stamped a butterfly, ever so faintly, in pink.  What I pretty card this sketch made.  Oh, here is the sketch, in case you are interested ...

Recipe:

Paper - My Minds Eye Vanity Fair 6 x 6 paper pad, Cardstock Cream, Dark Brown
Stamps - Sentiment by Verve, Butterfly by Hero Arts
Ink - Memento Black, Distress Ink Spun Sugar
Tools - Spellbinders Petite Scalloped Ovals, Petite Ovals, Cuttlebug Musical Flourish embossing folder
Other - Rhinestones by Queen & Co., Ribbon by May Arts

I hope you enjoyed today's card.  I think it is so pretty!  See you soon!


Happy Stamping!
Tina
 

Tuesday, February 14, 2012

Bee Benton Project!

Hello!  Back in January when I was at the Mesquite stamp convention, Jackie of Inky Antics, asked me to make a couple of projects with one of their new Benton Bear stamp sets.  Every Tuesday on the Inky Antics blog, she does what she calls Try It Different Tuesday, where she shows the same stamp or set and shows different creations using it.  Today, my cards are on her blog!  Woo Hoo!  When I sent her my pics of what I came up with, I made some comments in the email I sent her about my creative process in making the cards.  Well, she even added those comments in her post!  Wow!  I am so lucky to have gotten this opportunity to create for her blog.  I think I should just give you the link to her post, as it says it all.  Go here to see the post!  O.k. maybe I should also show you the pics here on my blog too, especially if you are one that just go through your list of blogs looking at the pics and then moving on to the next.  I admit I do this sometimes!  So here are my cards.  (And of course, the recipes along with a few comments ... you know I can't resist!)  Enjoy!


Card #1  Recipe:
Paper - Echo Park Country Drive 6 x 6 pad, (FYI:  I love, love that this paper was such a great match, but unfortunately, with a 6 x 6 pad, the paper doesn't go very far!), Cardstock White, Black, Yellow
Stamps - Inky Antics Bee Benton
Ink - Memento Black, Prismacolor Pencils, Gamsol, Stickles Yellow for bees
Tools - Spellbinders Classic Circles, McGill Tag Punch
Other - Twine from The Twinery, Pearls from Queen & Co.


Card #2 Recipe:
Paper - No DP!  Just cardstock - Yellow, Black, Red, White!  (Instructions: Make with 4 strips of 3/4 inch tall cardstock rounded on the ends with bottom strip 5 inches wide and each strip slightly less wide.  Top is 1 inch tall.  Adhere the finished 5 onto black cardstock and trim.  Trace front to create back and adhere at the top to the front to create the shaped card.  Create a shape for the front door).  FYI: Just don't look real close because I my cutting was done freehand!
Stamps - Inky Antics Bee Benton
Ink - Memento Black, Prismacolor Pencils, Gamsol
Tools - Spellbinders Classic Scalloped Hearts and Classic Hearts, Large Scalloped Rectangles (inside)
Other - Gelly Roll glitter pen, Rhinestones


Card #3 Recipe:
Paper - My Minds Eye Fine & Dandy 6 x 6 paper pad, Cardstock White, Brown, Yellow, Inky Antics Yellow Honeycomb Pad
Stamps - Inky Antics Bee Benton
Ink - Memento Black, Prismacolor Pencils, Gamsol, Stickles Yellow, Gelly Roll glitter pen
Tools - Spellbinders Classic Circles
Other - Brown Grosgrain ribbon, Brown Pearls

I also wanted to add how I came up with the inside honeycomb for my card:  I made a copy of card number 2 on my printer and reduced it to the size I wanted.  Then, I folded it in half and traced it onto the honeycomb pad.  Now, I went around and around trying to decide if it looked like a honeycomb or not.  I even called a friend to get her opinion.  I decided to just go with it.  Then a week or so after I finished my project, I saw that Inky Antics had come out with a Honey Pop set with a bee and the inside is a honey comb!  If you went to the linked Inky Antics blog, she includes this set on her post.  I have to say I like their honeycomb much better than mine.  And it would be much easier to use, because there is a stamp for it!  The whole bee set is pretty darn cute, and just think how it would compliment my Bee Benton set very well!  Putting it on my "wish" list!  Hee Hee!
What did you think of my Bee Benton projects? 

See you soon!
Happy Stamping!
Tina

Valentine Bunny!

Happy Valentine's Day to everyone!  I had so many more Valentines I wanted to make and even several that were partially done that I just didn't get to.  Oh well!  I figure heart cards are good anytime of the year, so some of my ideas that are in my head, you may still get to see.  But, I do have one more to show you today.    However, it is basically the same as the little heart shape easel that I did here.  But, I am going to show you anyway, because I did use a different stamp.  Here it is .... enjoy!


I know what you are thinking ... green on a Valentine?  It is my hubby's favorite color, so I had too!  Don't tell the "Valentine Police"!  Hee, Hee!  This bunny is the other set I got new from My Favorite Things, and just didn't get it made into V-day cards like I planned, but I figure I can use it year around, so look for it again soon!  Obviously, I am in love with the heart easel cards!  It makes into the absolute best shaped cards, don't you agree?

Recipe:

Paper - Valentine words by We R Memory Keepers, Green hearts by Bo Bunny (I think, as I only had small pieces left in my stash), Cardstock Red
Stamps - My Favorite Things Flopsey Bunny with Hearts
Ink - Memeento Black, Copics (shhhh ... don't tell anyone I used copics instead of my colored pencils)
Tools - Spellbinders Classic Scalloped Hearts, Classic Hearts
Other - Rhinestones by Queen & Co.

I will be back later today with a second post.  I wanted to do both posts this morning, but I am running out of time, as my hubby and I are off to Tyler to go to Red Lobster for our Valentine lunch.  Check back later today for several projects I completed with just one set of stamps.  This was a very special project I did for Inky Antics. 

Happy Stamping!
Tina

Saturday, February 11, 2012

Saturday's Sketch Share!

Hello!  I have two more Valentines for this share between Debbie and I.  Which is good since I said a few days ago, I would have some more Valentines to show you.  I still haven't gotten back to my Valentine making, which means that I only have today and tomorrow to finish. I have been on another project which I will tell you about at the bottom of this post.  But for now, let me show you our share cards.  I will show you my card, Debbie's card and the sketch we both used.  Enjoy!

My Card


Debbie's Card

The Sketch

I'm sorry that my card pic is kinda small.  You see, I forgot to take the picture of it before I sent to Debbie in the mail, and so she took a picture of it today and sent it to me thru email.  It asked her what size to send it in and I told her small because that is the option I pick on my camera when I am sending it to my own email.  Well, it seems her camera's small and my camera's small are not the same.  I hope you can make it out that I added tiny hand drawn hearts coming out of the balloon.  And I added "Love is in the Air" for my sentiment, which I typed on my computer.  The papers were from one of those $1 packs from Target.  Love them!  And the ribbon?  I found it at a thrift store.  The whole roll was a quarter!  Now that is a bargain.  So, you could do this hobby for less money that we do, but I don't!  For instance, last week, at my church's women's meeting, I volunteered to create a ticket for the women's tea we are having.  I knew just want would be great on it, so I did an order online to get the tea die set from My Favorite Things.  Crazy, since I don't know how often I will use this die, but any reason to spend money on my hobby, I am there!  Hee Hee!  Here is the die set I got.  So, my idea was to do a little tea cup and saucer at the top of the ticket.  With help from great friends last night, I am 3/4 done.  Here is a pic of it.


Isn't the little tea cup pretty?  I love them.  I think the ladies will be impressed.  But, what was I thinking when I decided to die cut 100 little cups, actually 200 because the cup is die cut twice, one in cardstock and one in the pattern paper.  The floral paper is from a 6 x 6 pad which mean I only have 2 sheets and I had enough for about 70 of them,  The last 30 will have to come from another pattern paper.  Oh well!  It can't be helped.  Thanks for letting me share ... now I am off to make lunch, so I can get back to die cutting more teacups!

Hopefully, you will see me on Monday with the last of the Valentines.  Have a great weekend!
Happy Stamping!
Tina

 
design by suckmylolly.com