Thursday, January 30, 2014

What's in Your Pocket? Card #3

Hello!  Sorry I am late posting today.  Today's card finishes the three part series on the pocket cards I did this week for The Crafty Scrapper's blog.  I was at the store teaching yesterday and I got great compliments about all the cards from my class takers, and also the store owner and manager.  Wow, that is pretty darn nice!  I will share the post as I wrote it below.  And add an extra photo at the bottom for you.  Enjoy!


Hello, it's Tina here to show you my third pocket card creation made using some wonderful products from The Crafty Scrapper.  


The card features a pocket horizontally across the width of the card, highlighted with a favorite border die from My Favorite things.  The sentiment is from an awesome set of stamps from Inky Antics.  The swirl is a chipboard from Maya Road that was inked with Distress pads and then embossed with an embossing folder.  This was a first for me, and I love the effect!  The flower looked like this before ...


And now, perfectly matches my card!  First, I changed the color by coloring it with my Copics.  Then I flattened it out and cut out the middle, so that it would be flat enough for me to add that big red rhinestone!  An altered flower ... wow! 

Stop in the Crafty Scrapper so you can see all three of my pocket cards in person and get a list of the supplies I used. 
  Happy Stamping!
Tina

Here is my extra photo of the tag pulled out of the pocket ...
And one more!  A good close-up of my "altered" flower!  
 
Happy Stamping!
Tina

Wednesday, January 29, 2014

What's In Your Pocket? Card #2

Hello!  I am off to teach today but I wanted to give you my version of the post that went live today on The Crafty Scrapper's blog.  If you missed yesterday, be sure to scroll down to see it, as today's card, yesterday's card, and tomorrow's card are all created with pockets on the front of the cards.  I will also be showing you an additional photo at the end that will not be on their blog.   Here is the my post ... enjoy!


Hello, it's Tina here, to share with you the second of the three pocket cards I have made using wonderful products from The Crafty Scrapper.


Today's card features a fold down diagonal pocket on the front.  I added a fun butterfly wood embellishment from Maya road and colored it with a Copic marker.  


The stamped sentiment on the tag is from a wonderful set of stamps from Inky Antics.  The tag was made from the backside of the floral paper.  It is one of those sheets that is made to cut apart.  As a stamper, I rarely use them.  So glad I got to today!

My card can be seen in person at The Crafty Scrapper and you can get a list of supplies used on this card when you stop in!

Thanks for stopping by!
See you tomorrow for my third pocket card creation!
Happy Stamping!
Tina

Here is one more photo from me ...


One more tag tomorrow ... see you then!
Happy Stamping!
Tina


Tuesday, January 28, 2014

What's In Your Pocket? Card #1

Hello!  I am in the middle of prepping my class kits for my class tomorrow, but I have a post that went live this morning on The Crafty Scrapper's blog, so I wanted to make sure you have the one from me as well.  If you follow the link, and compare mine below with theirs, it is a little different, but close.  I also have a an  extra photo to share with you at the end.  Oh, and one more thing, I will not be including the recipe supply list for these posts.  They want to drive the customers into their store.  If you have questions, you can always contact me.  Now, let me give you a little background about the card you will be seeing today and the two following in the next two days.  It  really helps me when there is some kind of theme or something that all the cards share. All three cards include some kind of pocket on the front of the card.  And you will be so proud of me, I used some of those thicker embellishments that I showed you, but as you will see, I made them work for me.  I think all three of the cards could be sent in the mail, but you would probably have too add a little postage.   Here is my blog post I did before any editing was done ... enjoy!


Hello, it's Tina here today to share a card with you using wonderful products from The Crafty Scrapper!

I made three cards, all created with cool pockets on the front!  So, I have one for you today.  Come back  tomorrow to see the second.  And on Thursday, I will show you the third. 


My first pocket card features awesome paper from Authentique. It is actually a baby line, but not today!  What that means, is that when you are at the store, don't limit yourself to only looking at papers in one area!  Since, I rarely make a card without stamps,  I thought this wonderful butterfly stamped image, by Inky Antics, was a perfect pairing with the Maya Road wood birdcage embellishment.  I colored the birdcage with a  Copic marker and I love the effect!


 Above view shows the tag being pulled from the pocket.  I want to make a note about the green ribbon.  The front side was a bright green that really didn't match the paper, so I flipped it over.  The nice edges at the top of the tag, were created with the We R Memory Keepers Envelope Punch Board.  The width of the tag is 2 1/4", so you line it up on that measurement and punch.  Flip over the tag and do the same on the other side.  Then, you can use the rounded punch for the other two corners.


Every card I make, I always make sure to have a place to write my card message.  Above shows my standard inside, measuring 3 3/4" x 5. The card can be sent for many occasions, so I have left it blank so that I might add my sentiment later.  But, it is so important to finish the inside when you are making your card.  This will save you time later looking for the right papers to match when you go to send it.

My card can be seen in person at The Crafty Scrapper.  Get a list of supplies used on this card when you stop in. 

Thanks for stopping by today!
Come back tomorrow to see my second pocket card creation!
Happy Stamping!
Tina

And the extra photo from me ...the tag out of it's pocket!


I will be back tomorrow with the next pocket card!
Happy Stamping!
Tina


Monday, January 27, 2014

For You, My Friend!

Hello!  I am back today with another card with that cute little Freida fox I used last week!  This time, I added glasses to her, which is also included in the set!  And I made her a gray fox so she would match the papers I used.  Here is my card ... enjoy!

 
Recipe:
Paper - Echo Park Yours Truly 6 x 6 pad, Cardstock White, Red
Stamps - Reverse Confetti Quirky Cuties: Freida Fox
Ink - Memento Black, Copics
Tools - Spellbinders Classic Scallop Circle, Classic Circle, The Stamps of Life Scallop border die

Other - Ribbon from May Arts, Rhinestones

Last Friday, I showed you the post that I thought would also be shown on The Crafty Scrapper's blog, but it seems that they thought my post was too long, and so without my knowledge they did an edit and removed part of it.  I was not that happy about it since I was not expecting it.  I now understand more of how they want their posts to look.  My second set of cards going live this Wed., were going to be in one post, but it was going to be especially long.  We changed that into three separate posts, for the next three days.  So, stop back here to see those, along with some with some extra pictures and details about the cards. 

Happy Stamping!

Tina

Sunday, January 26, 2014

Sunday Words of Wisdom!

Hello!  Since yesterday I went to the other stamp convention, I thought a quote about creativity would be in order ... enjoy!


I love all the color dots too!  Yes, you know I would!
 
Happy Stamping!
Tina
 

Saturday, January 25, 2014

Saturday's Sketch Share!

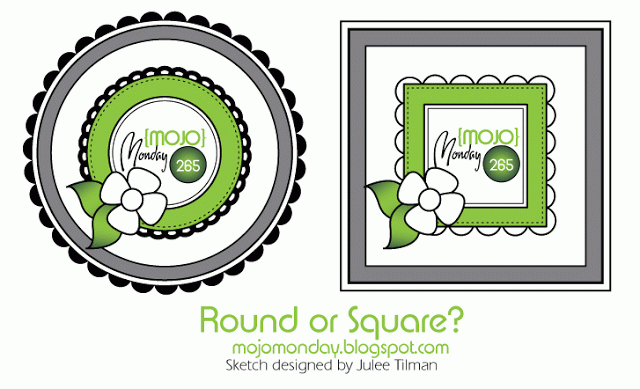
Hello!  I am back today with another sketch share between Debbie and I.  This is another week where we had a choice between circle or square.  I think it is so interesting that when Debbie and I first started doing this share together, she would almost always go with the square choice and I with the circle choice.  Now, about two years later, we have switched.  I mostly do squares (small ones) and she mostly does circles.  Let's get to our cards.  I will show you my card, Debbie's card, and the sketch choices we had.  Enjoy!


My Card
 

Debbie's Card

The Sketches
Debbie wrote on the inside of her card, that she wasn't sure about hers ... but I love hers!  And so much, that I might be "casing" that one!  I think that chevron pattern paper in the middle really sets off the other papers and colors.  She did mention that she had trouble finding a small enough sentiment to add to the middle.  I like mine too.  I did that triple stamping technique, but technically with my card, it should be a double stamping technique, as there were only two layers.  The only thing was I found a distress ink color that perfectly matched the green in the paper, but later, it seemed liked it faded a little.  Sometimes die inks do that, not sure why.  Do you like our cards? 

I am off today to the second of the two stamp conventions this month.  I debated about going, as my pocketbook is low, but I decided in the end, I might be disappointed if I didn't.  I will let you know if I find anything interesting in tomorrow's words of wisdom post.

Happy Stamping!
Tina

Friday, January 24, 2014

Through Thick and Thin!

Hello!  Well today is the day!  My first blog post is going live on The Crafty Scapper's blog today.  (The second one will be next Wed.)  I actually have the post that is going live below, but before that, of course, I want to share a little.  Here are a couple of photos of what they gave me to work with ...


As you can see in the second photo, a lot of the items are thicker, like the wood pieces, the chipboard pieces, and the flowers, than I normally add to my cards.  I decided I would address this fact in the post and explain that if you go too thick, your card will more likely be one that you would give to the recipient, instead of sending by snail mail.  When I owned my store, we would make samples for the store and never did I think about how thick I made one or how it would get sent.  But, since I closed my store, and the fact that most of the cards I make now, I do send in the mail, my whole thought process has changed.  And as you know, I also now make sure that the inside is done to complete the card.  I also talked about this.  I am happy with the post I did.  But of course, I worry a little, as the design team coordinator told us to not make the posts too long or to show to many photos.  Mine?  Well, I know you can guess ... yes, it is long and too many photos.  My thinking is that people can just skip over what they are not interested in but the information will be there if they are interested.  I look at blogs all the time.  And for me, if I am interested in their card, but they haven't included any details, I am always disappointed.  The other thing is that everyone else on the design team make scrapbook pages, books or something directly related to scrapbooking.  I am the only card maker.  One card I made that you will see has more of a "scrapbook" feel and the other's are more "my style".  Thanks for letting me give you my thoughts and background on this.  Below, you will find my post ... enjoy! (P.S. See you tomorrow for the Sat. sketch share!)


Hello, it's Tina, the resident card teacher, here today to share with you  three cards I made with some fabulous products from The Crafty Scrapper!

Before I show you my cards, I want to give you a little background.
Carolyn asked me if I would be the card maker for the design team. I was happy to do it. 
  I was given a packet of various papers and embellishments. 
 I quickly realized that thick embellishments were going to challenge my card making style.
I am one that actually sends my cards in the mail, so I am always conscience of the thickness.
 But, after looking around for some ideas, I decided it would be fun to make some thicker cards.
I just have to know that the thicker ones are going to be the ones that will be hand given not sent.
So, my first card to show you is a thick one, but oh, so pretty!
And since I was going thick, I got to use my Tim Holtz Rosette die ... woo hoo.
I almost always make a card from either a sketch or 
CASE (copy and share everything) one that I see that I like.  
This is a CASE from one on my Pinterest board.  You can see it here.


There were flowers in my packet but I wanted the color to be brighter,
so, I changed the color with a Copic!
Easy Peasy!


 The next picture shows how thick the card is.
One note, I have seen on blogs where they used a hot glue gun.  
I have never used this form of adhesive
until today!  
I found it worked great to adhere 
the twine, flower, and rosette 
to my card!


Adding that rose reminded me of a stamp!
(Of course, it did!)
So, I used the same papers and supplies
to make a second card (a thin one)!
See how different one central image can change the cards look!
Oh, and I did a CASE on this card. 
I also did my favorite technique ... paper pieced her dress to match!

Before I go onto my third card today, I want to give you a tip.  
Those that have taken classes from me, know this ...
I always add panels to the inside of the card
when I am making the card.
Sometimes I stamp the inside sentiment, 
but if they are cards like the two above,
you might not know the occasion it will be used for, 
like birthday, thinking of you, etc.
In this case, I leave it blank.
But, adding the insides saves time 
looking for the right papers later.  
Here is the inside for the first two cards.


For my third card, I decided to go with a Valentine theme.
This one is in between thick and thin.  
I actually did a CASE from a card I have made before.  
See it here.


A couple of things to note on this card...
The chipboard heart and "always' really sparkles with 
that red glitzy glitter from Elizabeth Crafts!
And I wanted to add something to her dress, so 
I used the Copic Colorless Blender 
to add the dots!
And here is the inside ...


Recipes for all three cards follows.
  All supplies can be found or ordered at The Crafty Scrapper.

Card #1 & #2-
Paper-American Crafts Autumn Crisp line: "Park" (both sides),  Aqua dot is from Bo Bunny Very Vintage Double Dot 6 x 6 pad, Cardstock Rose Pink, White
Stamps - Card #1 Sentiments from Inky Antics Simple Sentiments set, Card #2 Girl & Sentiments from My Favorite Things Pure Innocence Roses
Ink - Memento Black, Copics
Tools - Tim Holtz Mini Rosette die, My Favorite Things Simply Scallops Lg. die-namics, and Doily Duo Small die-namics, Spellbinders Circle
Other - Maya Road Jornaling Tags, Twine from The Twinery, KaiserCraft  Paper Blooms, Rhinestones

Card #3
Paper - Crate Paper Love Notes line: "Beau Book" (both sides), Crate Paper Bingo Love card, Cardstock Red, Natural White
Stamps - My Favorite Things Pure Innocence Love You With All My Heart
Ink - Memento Black, Copics
Tools - Spellbinders On the Edge hearts die
Other - Chipboard -Heart & Always by Maya Road, Red Glitter Ritz by Elizabeth Crafts, Ribbon by May Arts

Thanks so much for stopping by!
Happy Stamping!
Tina

 
design by suckmylolly.com