Saturday, March 30, 2013

Saturday's Sketch Share!

Hello!  Debbie and I both made Easter cards, so I have two more Easter cards to show you.  Let's get right to it.  I will show you my card, Debbie's card, and the sketch we both used.   Enjoy!


Tina's Card
Debbie's Card

The Sketch
Oh my, are they not too of the cutest Easter cards?  I love them both.  You?

The inside sentiment on my card said "Hippity Happity Hoppity Easter"!  So, between that sentiment and "Have a blessed Easter" sentiment ... have a wonderful day!

See you next week!
Happy Stamping!
Tina

Friday, March 29, 2013

Easter Lilly for You!

Hello!  I have another Easter card for you today.  I wanted to do just a couple more religious cards to have to send and so I came up with this one.  The design is a very simple one and I love how it came out, but I have to tell you, I tried my best to make it less simple, but everything I tried just look too busy.  Sometimes, less is more.  When you see the card, I know you will understand ... enjoy!


You see what I mean?  The sentiment is so powerful, a simple lily completes the card.  I love this one.  I only made a couple but I had more time to make more.  Easter just came too early for me this year!  Oh well, my stamps will just have to wait until next year to get inked up!

Recipe:
Paper - We R Memory Keepers Simply Spring 6 x 6 pad, Green from the same line but is a 12 x 12, Cardstock White
Stamps - Just Rite Easter Blessings

Ink - Memento Black, Copics
Tools - We R Memory Keepers Corner Rounder
Other - Lace, Yellow Sheer Ribbon, Pearls

I have one last Easter card to show you tomorrow for the Saturday sketch share. 
Happy Stamping!
Tina

Thursday, March 28, 2013

Say Happy Easter in Glitter!

Hello!  Today's card, well, I should say cards, because I have 4 to show you, but they are all the same design just different glittered elements.  Remember the butterfly glittered card I did a few weeks back on a Saturday?  I used the same products here for these.  At the scrapbook show I bought some peel-off stickers with eggs.  They were really supposed to be Faberge eggs, because the sheet also had stands for them, but I thought of Easter.  I figured I had enough paper to make four cards, which was perfect, because I wanted to have eggs with flowers and of the six eggs on the sticker sheet, only four had flowers, the other two had just designs.  So, let me show you ... enjoy! 


What do you think?  I know these are not traditional Easter cards, with bunnies, chicks, or crosses, but I wanted to use what I had bought.  It is hard to see, but I did use the Ritz Glitz glitter from Elizabeth Crafts and then colored over that with copics.  Love this look!  So sparkly and soft to the touch.  (I know you can't feel it!).  The layout is one I have done before, quite different but I like it.  At the last minute, I decided the card was too plain, so I added the rhinestone swirl elements.  Really love them now!  You?

Recipe:
Paper - 3 Bugs in a Rug Little Chick line (from my stash), Cardstock White, Black
Stamps - Sentiment by American Art Stamp
Ink - Memento Black, Copics
Tools - Elizabeth Crafts Ritz Glitz Glitter, Elizabeth Crafts Peel-Offs
Other - Grosgrain Ribbon, Swirl Rhinestones by Want 2 Scrap

See you tomorrow with another Easter card.

Happy Stamping!
Tina

Wednesday, March 27, 2013

Smile! It's Your Birthday!

Hello!  Now, I have a few folks that I am selling my cards too!  Yea!  And that is what this card was made for ... the request was for a 17 year old that likes purple, so I went with one of my favorite stamps and made this one for her ... enjoy!
 

Isn't it crazy how I go to the same stamps over and over, even though I have thousands to pick from?  But, there is no way I would be satisfied to only have a few stamps!  That is just part of this crazy hobby of mine!  I love how the came came out, don't you?

Recipe:
Paper - Floral paper came from my stash, it is text weight, so I know it's been around a while, not sure who made it, Purple dot is Bo Bunny from one of their 6 x 6 pads, Cardstock White
Stamps - The Cats Pajamas - sentiment and bunny, It's your Birthday sentiment by Verve
Ink - Memento Black, Copics
Tools - Cloud die by Papertreyinc, Spellbinders Scallop Petite Oval
Other - Rhinestones by Queen & Co.


I have three more Easter cards to show you, one tomorrow, one Friday, and the last on Saturday, the share day. 

Happy Stamping!
Tina

Tuesday, March 26, 2013

In the Garden of Life!

Hello!  I love the way today's card came out.  I used another of the sets I got at the scrapbook convention from Rubbernecker and I used a sketch from Mojo Monday from their 2009 sketch book.  I am not sure I have ever done this sketch, but I love it.  Let me show you.  Enjoy!


See what I mean?  Such a simple sketch, but it really has a lot of interest.  The flowers come in a 3 part set.  First, you have the outline which I stamped in black, and then you have 3 solid flowers which I stamped in ink and spritzed with a little water before stamping, and then the leaves are also solid which I did the same way, inked and spritzed.  Both I stamped over the top by just guessing, as you can see they are not perfectly lined up, but I like this effect.  I guess if you really wanted it to be exact, you would have to use a stamp positioner, but fortunately, I didn't have to go that route, since I like the effect.  The flowers are a little more yellow than they appear here.  They are closer to the color of the ribbon, so it all matches.  What do you think?  Do you like this one?

Recipe:
Paper - Fancy Pants Designs Park Bench 6 x 6 pad, Cardstock White, Black
Stamps - Rubbernecker Sketch Poppies set
Ink - Memento Black, Marvy Matchables Brilliant Yellow, Carribean Blue (just a touch of this on the leaves to make it match the paper), Jungle Green
Tools - Spellbinders Classic Circle, Classic Scallop Circle
Other - Black Pearls, Ribbon by American Crafts

Right now I am going to write my post for tomorrow, as in the morning it will be a mad rush for me to get everything finished and packed in the car and to drive to Waxahachie for my class. 

On another note, I just found out how much I sold at the garage sale last weekend.  I don't know if I told you, but there were ton more stamps this time, than last and so maybe, that is why my take (after the store's percentage) is only $63!  YUK!  Oh, well, that is $63 more than I had before, right?  I had all the sets of 5 to 10 stamps marked $5, maybe next time $3 or if I can talk myself into it ... $1???  We'll see!  I mean it was hard for me to go down to $5 this time, but I am getting tired of hauling the stuff back and forth, and after all, this is ex-imprints inventory, not my personal stash stuff.  Thanks for letting me vent here!

See you tomorrow!
Happy Stamping!
Tina

Monday, March 25, 2013

Have a Blooming Birthday!

Hello!  Today's card was a little experiment, as I tried coloring on pattern paper with my copics.  I love the results when I use colored pencils on pattern paper, so I was thinking this might give the same result.  However, it really didn't, but by the time I figured this out, my whole card was pretty much put together and I decided to just go with it.  This card did get sent out, so hopefully they still think it is pretty, even though it is not my favorite.  Let me show you my card and you can see what you think.  Enjoy!

The layout of the card is pretty and I love the sentiment.  What are your thoughts?

Recipe:
Paper - My Minds Eye Unforgettable 6 x 6 pad, Cardstock Natural White, Rose Red
Stamps - Flowers from Inky Antics Daisy Bouquets set, Sentiment from Woodware USA
Ink - Memento Black, Copics

Tools - My Favorite Things Double Scallop border die-namics, Spellbinders Classic Oval
Other - Pink Rhinestones, Sheer ribbon by Midori

Oh, one more thing, this card was made for Donna's mom for her 70th, so I wanted to share the inside sentiment that I took from a set of stamps by Rubbernecker ... "May your Heart Always be Young and Your Dreams Live Forever".  I thought it was perfect! 

This is my class prepping week, as I am on to that next.  But, I have enough cards made to show you one a day this week, that is if, I get the posts written.  I finished my Easter cards yesterday, but I am going to wait until later in the week to show you those. 

Happy Stamping!
Tina

Saturday, March 23, 2013

Saturday's Sketch Share!

Hello!  This is one of the week's where our choice is between square or circle.  We both went with the square choice.  Let's get right to it.  I will show you my card, Debbie's card, and the sketch we both used.  Enjoy!
 
 
My Card

Debbie's Card

The Sketch
Do you like on mine how I incorporated the ducky's tulip into the flower on the sketch?  I think it works.  I recognize the 6 x 6 pad that Debbie used for her main element on her card.  Great colors too!  What do you think of this sketch?  I like it! 

This week finishes off the 2011 sketches from Mojo Monday.  Next week we will be on to their 2012 sketches.  Remember a while back I gave you a list of my favorite "go to sketches" from the ones we have done so far?  Well, I counted and we have done 32 more weeks since then, so I have gone through them all and picked out 15 of those that I think I want to add to my "go to sketches" folder.  I want to share them with you, but it is going to take me some time to add them all to a post, so I will work on that for you in a post soon.


Also, I wanted to tell you I did go last night to the garage sale at The Crafty Scrapper.  There was tons of stuff and I got some nice bargains!  There is still alot left, so go!  The sale runs thru today and they close at 5. 

My goal today is to get as many Easter cards done as possible.  So, next week I will have those to show you, plus, I have a couple of birthday cards to show you. 

See you soon!
Happy Stamping!
Tina

Friday, March 22, 2013

Easter Blessings!

Hello!  A couple of days ago, I said I would be back to show you a pretty Easter card, well, I am a day late, but I do have a pretty card to show you!  I had another sheet of the Authentique paper that I used on the class cards I did with the cross, so I decided to put it to good use and combine it with an Easter set I got a while back from Just Rite.  Here it is ... enjoy!


The swirls in the paper just look so elegantly perfect for an Easter card.  I had enough paper to make 7 of these.  On the inside I used stamps from the same set and stamped "He is not here, He has Risen! Hallelujah".  Love it!

Recipe:
Paper - Authentique Renew, Cardstock Seafoam, White
Stamps - Just Rite Easter Blessings
Ink - Memento Black, Copics
Tools - Spellbinders Scalloped Borders One (love this new set), Classic Oval, Classic Circle, We R Memory Keepers Corner Rounder
Other - Yellow Pearls, Ribbon by Midori

I have decided I cannot resist going tonight to the garage sale at The Crafty Scrapper!  Should be fun!  But, I will have to watch out for the "wild, crazy ones that will knock you down to get THE bargain" ... you know the ones!  They can go first!  LOL! 


See you tomorrow for the sketch share!
Happy Stamping!
Tina

Wednesday, March 20, 2013

Watch Where You're Pointing That Thing!

Hello!  I told you I had a silly card to show you today, and I know you believe me, after that title!  I borrowed a Cat's Pajamas set from a friend of mine and made this Anniversary card for my hubby a couple of weeks ago.  It really is a Valentine set, but I thought it would work for this occasion too!   Here you go ... enjoy!


Pretty darn cute!  I as so glad that the hubby likes my silly cards!

Recipe:
Paper - My Minds Eye Remarkable 6 x 6 pad, Couds from stash (Bella Blvd. I think), Cardstock White, Red
Stamps - The Cat's Pajamas

Ink - Memento Black, Copics
Other - Twine by The Twinery, Button, Baubles

Garage sale update ... I have a confession.  I went out to my room (which is very full of stuff) yesterday, with the intention of getting rid of my stuff to add to the ex-Imprints stuff for the garage sale.  Well ... I don't want to give up my stuff!  Everything I don't use, I think, I might someday!  And, because I have been doing this so long, there is a lot of stuff, that if I give up, I can never get again.  So, for now, I am happy to try to get rid of the ex-Imprints stuff, which if I sold it all (which I won't), would be over $700.  Keep your fingers crossed for me!


I will have a pretty Easter card to show you tomorrow. 
Happy Stamping!
Tina

Tuesday, March 19, 2013

Make-n-Take Madness!

Hello!  I will be participating in a Make - n- Take at the store where I teach.  Here is the save the date card for it ...


And here is what my Make-n-Take is going to be ...
 
And, of course, the inside of the card ...


Washi Tape is so "in" right now.  I seem to collect tape rolls, and decided it might be time to make a card with them, plus,  I figured others are like me, and would like an idea on how to use them.  I went to Pinterest to get some ideas.  This is the one I saw that I liked the best, but it was a little plain for my style.  The make -n-takes are supposed to be reflective of the teacher's style, so I changed it a little.  Also, the tape they used had all those different colors on one tape, but I wanted to use several tapes to of course, sell more.  I kept thinking that about black and white and how it would probably help the tape colors to pop.  Found in my stash, this Bo Bunny dot paper, which I know the store carries, and created my card!  I love it!  What do you think?  I know the save the date card above doesn't give many details, but I think that you pay one price and do one or all of the make-n-takes.  It's a good deal and it was really a fun day when they did it last year.  When I have all the details, I will pass them along to you.  For now, I wanted you to see my card I am doing!

Update on pricing for the garage sale ...last time I sold all the wood mounted stamps separately for $1 each, but I was told that they were hard to see and there was so many, so I have changed ... this time I have put 5 to 10 stamps in each baggie and each will see for $5 each.  There are 100 bags!  Oh my goodness!  Plus, I have grab bags of all kinds of stuff for $5.00 each too!  I repriced most books to either $.25 or $.50! Today's goal is to add some things from my stash to sell too! 

I have a silly card to show you tomorrow.  So, stop back by!
Happy Stamping!
Tina


Monday, March 18, 2013

He Has Risen!


Hello!  Easter is one of my favorite holidays to make cards for, but since Easter is so early this year, I will be limited to the number of different Easter cards I can make.  One of the ladies at church, asked me at least a month ago, to make her 4 Easter cards for her to send.  So, I figured I had better make hers first, and then work on mine.  Here is hers ... enjoy!
 

This is very similar to the card I made last year for my class, but I made it with the Inky Antics cross instead.  Love the white on white with the touch of purple for Easter.  I gave her cards to her yesterday and she liked them.  Do you?

Recipe:
Paper - Cardstock White, Purple
Stamps - Inky Antics Floral Faith, Sentiment from Just Rite Easter set
Ink - Memento Black, Copics
Tools - Cuttlebug Polka Dots & Flourish embossing folders, Spellbinders Petite Ovals
Other - Ribbon by Midori, Rhinestones, Pearls


Last year, the church ladies hosted a women's tea and I made the tickets for them with a die cut tea cup on each one. To remind you what I made last year, here is a pic of it ...


But, this year, they decided rather late that they were going to be having a tea again, and so instead of a month to make the tickets, I had less than a week, so even though the die cut tea cups were adorable, I had to change and go with a stamped image.  My friends gave me the suggestion of how to color them, as they thought a monochromatic color scheme would be best.  Below is the different color combinations I came up with.  Yes, I know, one color scheme would have worked, but that would have been boring, so I did 10 of each color scheme.  See the pic below!


Do I like them as well, as last year, no, but they work!  The stamp is from a tiny set ($2 retail) from Prima ... yes the flower people!

The Crafty Scrapper is having another garage sale and I am in the middle of lowering the prices and repackaging the stamps and supplies that was all my ex-store merchandise for the garage sale that is this coming weekend.  Here are the details in case you are interested in going:
The Scrapbook Hoarders Ultimate Garage Sale
Pre-Sale Friday, March 22nd, 5 p.m. to 10 p.m. To get into this sale, you need to bring 3 items for the troops.  Go
here to see the list. Or Shop Saturday, March 23rd 10 a.m. to 5 p.m.

See you tomorrow!
Happy Stamping!
Tina

Saturday, March 16, 2013

Saturday's Sketch Share!

Hello! I bet you were wondering about me since you haven't seen me all week. We got back from our cruise last Sunday. We had a good time, even though I was sick during most of it. Since we have been back, I have worked on several projects, so I will have a few posts for you next week. And of course, I have today's share between Debbie and I. I have to admit I cheated ... you see, normally, I don't open Debbie's card until I have finished my card, so that I am not influenced by what she made. But, this week, I didn't get to her card until Wed. and so, when her card came on Tuesday, without even thinking, I opened it right up. Her card is a St. Patrick's Day card, and I thought ... that is what I will do too! So, I did cheat on the theme, but the bright side, that means I have two St. Patty's Day cards to show you! Here is my card, Debbie's card and the sketch we both used. Enjoy!
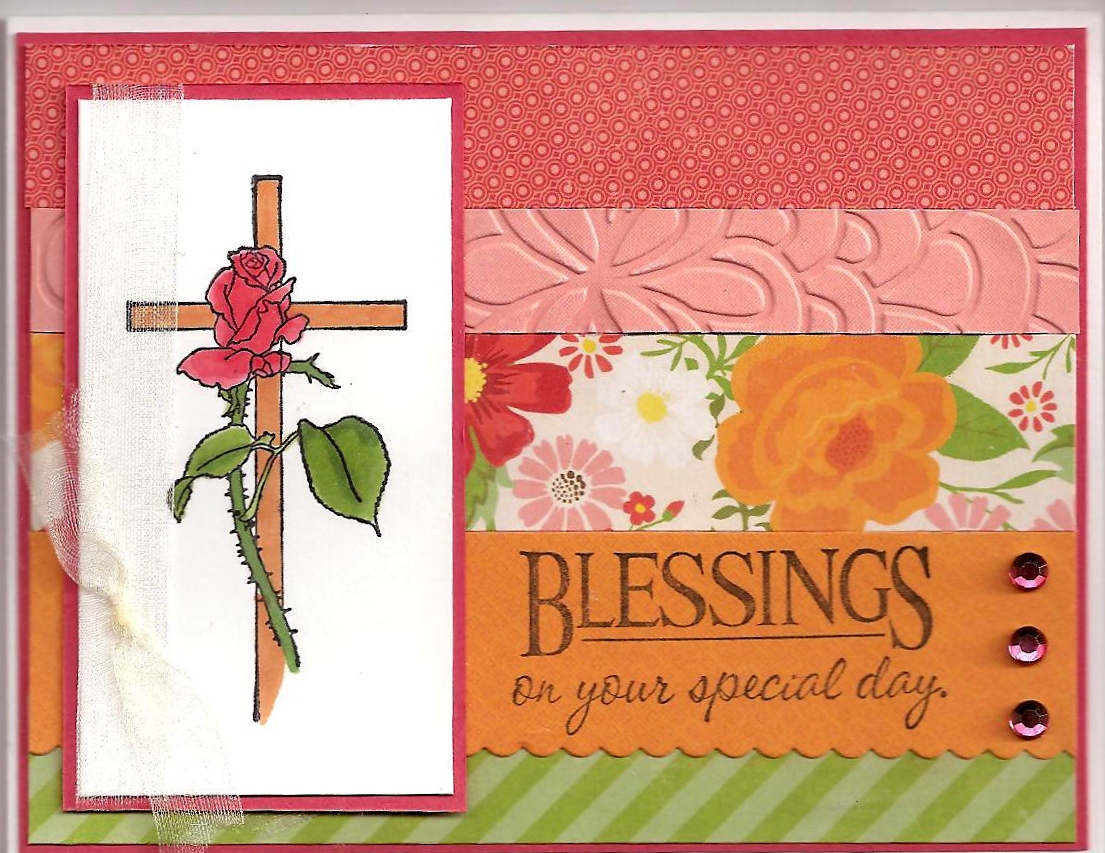


My Card

Debbie's Card

The Sketch
What do you think?  Both are pretty cute, huh? 

The Crafty Scrapper is having another garage sale next Saturday, so I am taking all of the ex-Imprints product to sell again.  Last time, I marked every stamp $1 each, but now I am thinking I might even go lower than that... yikes!  I do know the longer that time passes, the harder it is to sell my wood mounted stamps and something is better than nothing, besides I get tired of hauling all the boxes back and forth.  I am going to work on the pricing tomorrow.  I'll let you know how it goes, when I pop in on Monday with a new creation for you.


Happy St. Patty's Day!  Happy Stamping!
Tina


Monday, March 11, 2013

Where There is Love ... There is Life!

Hello!  I have one more card I made for my friend needed a couple of special cards (see last Friday's post).  This one is for an anniversary.  I love all the white on white cards out there so that is what I did on this one.  Let me show you ... enjoy!


I changed the shadowing a little in the editing so you could see the details.  Simple, elegant and oh, so pretty!  The inside got the Happy Anniversary sentiment but I thought this sentiment from Verve was so wonderful to add to the front of the card.  I embossed it in silver, only because I thought it would look better than blank ink.  What do you think?

Recipe:
Paper - White Cardstock!
Stamps - Verve Text Objects set
Ink - Versamark, JudiKins Detailed Silver embossing powder

Tools - Cuttlebug Victorian and Swiss Dots embossing folders, Spellbinders Classic Heart, A2 Scalloped Borders One (new and love it!), Fancy Framed Tags 2
Other - Silver dots


I am writing this before my cruise, but as you see this, I should be home.  Maybe I'll pop in and let you know!  See you soon!

Happy Stamping!
Tina

Saturday, March 9, 2013

Saturday's Sketch Share!

Hello!  Another sketch share day!  Let's get right to it ... I will show you my card, Debbie's card, and the sketch we both used.  Enjoy!


My Card

Debbie's Card

The Sketch
What do you think of this sketch?  I kinda like it.  It is different enough that it grabs your attention!  And this week's cards?  Well, I love them both!  For me... I must be on a butterfly kick.  I got these peel-offs at the last convention and added copics on top of the ritz glitter.  I don't think you can see in the pic how bright and sparkly it really is!  So pretty!  Both are great!  Don't you think?

See you Monday for the last of the posts I am writing on Thursday, Feb. 28th.  After that, you'll have to wait a few days until I get some more cards created! 

Happy Stamping!
Tina

Friday, March 8, 2013

Blessings on Your Special Day!

Hello!  Today's card was made for for a friend of mine (actually she was the hospice social worker for my mom) who asked me to make a couple of special cards for her.  She told me her daughter n law loved the lord, so I decided to combine birthday and inspirational together for this card.  Let me show you ... enjoy!


I thought this cross with the rose would be perfect.  The sentiment was the only thing I could find that kinda went with it.  On the inside of the card, I stamped Happy Birthday to make it all go together.  What do you think about this one? 

Recipe:

Paper - Echo Park For the Record 2 6 x 6 pad, Cardstock White, Rose
Stamps - Cross by Eureka Stamps, Sentiment by Penny Black
Ink - Memento Black, Copics

Tools - My Favorite Things Mini scallop border edger, Lifestyle Crafts Bloom embossing folder
Other - Ribbon by Midori, Rhinestones

See you tomorrow!
Happy Stamping!
Tina

Thursday, March 7, 2013

You Add Sunshine to My Life!

Hello!  As promised from yesterday, I am back with another card using the poppy die from Memory Box.  For yesterday's card, I die cut the poppies out of a white panel and told you I would be back today to show you another card with them.  So, me show you my card and then I can give you more details.  Enjoy!


I did the same as yesterday, and cut out of pattern paper, but then I used the white cardstock poppies and colored them with my copics before I put them into the pattern paper opening.  This is technique that I cased from Pinterest.  This whole card is so pretty to me.  What do you think? 

Recipe:
Paper - My Minds Eye Stella Rose "Mabel" 6 x 6 pad, Cardstock White, Olive Green, Orange
Stamps - Inky Antics Simple Sentiments
Ink - Versafine Black, Copics
Tools - Memory Box Prim Poppy die, Spellbinders Petite Oval, Verve Pennant Trim die (love this!)
Other - Ribbon by Creative Impressions, Rhinestones

See you tomorrow!
Happy Stamping!
Tina

Wednesday, March 6, 2013

Monochromatic Poppies!


Hello! I have something new to show you today. All over Pinterest and the blogs, I have seen the poppy die from Memory Box. Oh, and I believe Debbie used it sometime last year on one of the Saturday's posts. Well, I decided I needed to "own" it and so I got it at the first stamp convention in January but just now getting around to playing with it. The idea I saw is how they die cut out of pattern paper, so now you have two things, a die cut with pattern paper and also, the opening of the paper where the paper was removed from the die cut. So, I did both ways. Today's card is the die cut out of pattern paper.  Let me show you ... enjoy!


I didn't want it to pop up over the white panel, so I die cut the white panel, which gave me a white poppy die cut which I used for card number 2 which you will see tomorrow.  The opening the die cut left, I put the pattern paper one in, so it looks seamless!  I have to say, the blue monochromatic thing began as a "happy mistake", as I just picked a paper, any paper, to die cut the poppies to see how they would look.  And I liked it!  Even though ... blue poppies?  No rules, right?  I do like the look of monochromatic cards, and so I went with it.  And made a simple card too!  Do you like it, blue poppies and all?

Recipe:
Paper - Echo Park For the Record 2 6 x 6 pad, Cardstock Blue, White
Stamps - Inky Antics Simple Sentiments
Ink - Marvy Matchable Blue
Tools - Memory Box Prim Poppy die
Other - Rhinestones by Queen & Co, Ribbon


Come back tomorrow to see what I did with the die cut poppy I got from the white cardstock.
Happy Stamping!
Tina

Tuesday, March 5, 2013

You Make My World Happy!

Hello! Today's card I made for a friend's belated birthday.  I love sketches with circles.  This card was another case from Pinterest except that their card was a square one, and I thought it would do just fine as an A-2 size and I was right!  I love how it came out!  So, much so, that I made one more, same paper pack, just different paper choices!  Here are the both of them!  Enjoy!


So cute!  I love them both, well, the top one I love more and that is why I gave that one away!  I especially like the placement of the sentiment on this first card.  On the second card, as soon as I stamped so high, I thought oh no ... but decided to just leave it.  Do you have a favorite?

Recipe:
Paper - My Minds Eye Lime Twist Life of the Party 6 x 6 pad, Cardstock White, Green, Red
Stamps - My Favorite Things Being Cute is What I Do PI
Ink - Memento Black, Copics
Tools - Spellbinders Classic Circles

Other - Rhinestones

See you tomorrow!
Happy Stamping!

Tina

Monday, March 4, 2013

Happy Bird-day!

Hello!  I have another simple birthday card for you today.  And I used a sketch from the year before last when I was doing those monthly sketches for you from sketch for you to try.  It is just a classic, great, but simple sketch.  Let me show you my card ... enjoy! 


See what I mean about the sketch?  The background with how the papers are layed just gives such a great base for whatever your main image is, in this case, this great bird cage and bird.  Love it!  You?

Recipe:
Paper - Basic Grey Serendipity 6 x 6 pad, Cardstock Black, Yellow, White (for inside)
Stamps - My Favorite Things Contempo Cage Stamp & Die set

Ink - Memento Black
Tools - MFT Contempo Cage Die Set
Other - Twiner by The Twinery, Rhinestones

See you tomorrow!
Happy Stamping!
Tina

Saturday, March 2, 2013

Saturday's Sketch Share!

Hello!  I am back today with another sketch share between Debbie and I.  Truthfully, I am not sure about this sketch.  I will let you be the judge.  Now, even though I am not sure if I like the sketch, I have to say I love my card.  I used some new stamps I got at the scrapbook show from Rubbernecker.  Let's get to it ... I will show you my card, Debbie's card, and the sketch we both used.  Enjoy!
 
 
My Card
Debbie's Card

The Sketch
Just a couple of details about my card ... in case you are wondering, the inks I used for the poppies are the Tim Holtz distress inks in Spiced Marmalade and Barn Door and I used the direct to stamp method.  At the show they just stamped this solid over the line drawing stamp by the guessing method.  No stamp positioner.  So, that is what I did too!  That is why it is not perfect, but you know what?  I like it that way!

And on Debbie's card?  Well, that is one crazy lady!  She is definitely wild!  What do you think about the sketch?  Do you like it?  Would love to hear your thoughts.


Happy Stamping!
Tina

Friday, March 1, 2013

Celebrate Good Times!

Hello!  I have birthday card to show you today, of which was in the collection of cards I made for the lady at church.  This one is very simple.  And of course, a case from Pinterest.  Let me show you ... enjoy!
 

See what I mean, but simple?  I made the paper work for me, in other words, because it said Happy Birthday all over it, I didn't have to had much more.  Super simple, but I like it.  And, it is nice because it would be a great card for a male, boy or man.  What do you think?

Recipe:
Paper - Bo Bunny Surprise Line: "Birthday", "Confetti", Cardstock White, Blue
Stamps - Verve Birthday Bash
Ink - Memento Black, Copics

Tools - We R Memory Keepers Corner Rounder
Other - Rhinestones

See you tomorrow for the sketch share!
Happy Stamping!
Tina

NOTE:  I just finished writing all the posts through Monday, March 11th, so I will have a post a day (except Sundays).  Enjoy!

 
design by suckmylolly.com