Saturday, June 27, 2015

Saturday's Sketch Share!

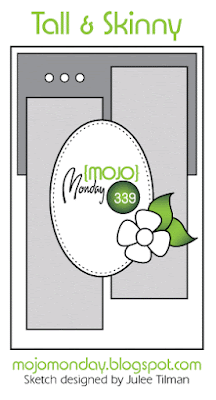
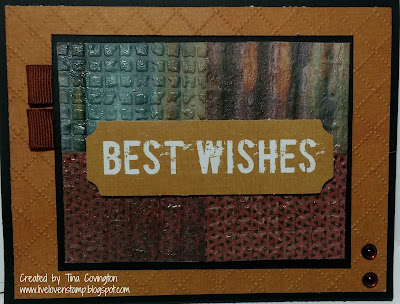
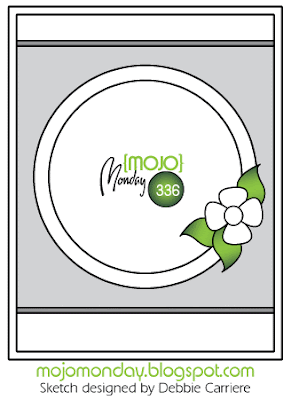
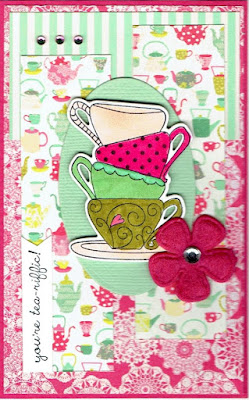
Hello!  I am back today with a really fun sketch between Debbie and I.  It is a week where the sketch is what they call Tall and Skinny.  So if you are doing a card that will still fit into an A-2 envy, your card front is 3 1/2" x 5 1/2", which is the size Debbie and I both did this week.  Another option is to do it taller.  Let me show you this week's cards, as they are both really cute.  Enjoy!

My Card


Debbie's Card

The Sketch
Yes, you have seen my image of the stacking tea cups before, but I picked up some paper pads at the show at great prices and the paper was from one of the Authentique ones.  Perfect to combine with my tea cups!  Oh, and the stamp is not the only thing I have done before, as I have done this sketch before too!  I just didn't do in a tall and skinny version,. It is a keeper of a sketch whatever size you do it in!  I love Debbie's card!  You know how I love fun sentiments to match my stamp images! 

I am off to teach again today.  I had 9 in class on Wed. and I will have 8 today, plus I also sold 3 kits, which equals 20 ladies, not too shabby, huh?

See you soon!
Happy Stamping!
Tina

Sunday, June 21, 2015

Father's Day Words of Wisdom and a Fun Card!

Hello!  On Sunday's I used to always share a quote or words of inspiration with you but I have kinda gotten out of the habit of doing that.  Since today is Father's Day, I thought it was a good thing to do.  Yesterday's cards were with the nautical theme and today's words go perfectly with them ...enjoy!

"A father is neither an anchor to hold us back, nor a sail to take us there, but a guiding light whose love shows us the way."   I love this.  Thinking of my dad, who has been gone since '96, I thought this fit him too.  And I guess in a literal way, as well, since he was in the Sea Bees in the Navy. 

Now, I also made a fun card for my hubby for Father's Day.  This one is from me and CoCo, the Chihuahua.  Enjoy!

 
I thought the sentiment was perfect ... "I scream, you scream, we all scream for ice cream", as we all love ice cream!  (Even CoCo!)  Gary favorite color is green, so I always try to do green for his card.  This one was a challenge to find green to coordinate with ice cream colors, but I think I did a pretty good job!  He just opened his card and he liked it ... yippee!  Oh, on the inside, it said "You are so Cool", and Happy Father's Day. 

Have a great day and don't forget to call or think about the Father's in your life!

This is my teaching week.  I have already started prepping as their is a lot of die cutting to get done. 

Happy Stamping!
Tina

Saturday, June 20, 2015

Saturday's Sketch Share!

Hello!  First, I want to say that yesterday was such a fun day at the scrapbook convention.  I got some good stuff, including a bunch of bling at great prices.  With teaching classes, it is great to get some bargains on stuff I use a lot of.  I was pleased that I stayed within my budget and did not use my credit card ... YEA!  The best part of the day with time spent with friends!  Now, on to today's share between Debbie and I.  When both Debbie and I saw the sketch, we both thought nautical.  When you see it, you might too!  Mine, of course, is more whimsy!  I love them both.  You can be the judge.  I will show you mine, Debbie's, and the sketch we both used.  Enjoy!


My Card


Debbie 's Card


The Sketch
Debbie mentioned that this sketch would not be one she would do again.  I am wondering if that is because she hand did the flags.  You can see I cheated and use one of my favorite border dies from Verve!  I like the card. I remember long time ago, I never liked slanted panels, but I do now! What do you think of this week's sketch? 

I have to finish my hubby's Father's Day card, so I hope to be back with that tomorrow! 

Happy Stamping!
Tina

Friday, June 19, 2015

Simple Guy Cards!

Hello!  The cards I have for you today are actually ones I made for The Crafty Scrapper's design team blog.  I made them in mind hoping that they would be on their blog before this weekend since it's Father's Day, but the design team coordinator is having some personal stuff going on and is a little behind.  I am hoping that I don't get in trouble here, but I decided to go ahead and show you the cards here on my blog before Father's Day.  I was given a 6 inch pad by KaiserCraft called Scrap Yard.  All the pages are just mostly designs in manly colors and I thought making some simple guy cards for any occasion would be a great idea. Here they are ... enjoy! 
The first card I made by just cutting the pages into 1 1/4 inch squares to create a background.


The next one, I added embossing in two ways, first by using embossing folders and then by embossing with ink and clear embossing powder.  Both of these methods added more texture to the papers, which gives it a different look.


For the third card, I used larger panels of papers.  On the first three cards, I used the punch out sentiments in the back of the pad.  As you know, I have "a lot" of word stamps, so for my own cards, I usually do a stamped sentiment, but I do things differently sometimes for the cards I create for the scrapbook store. 


A couple of the papers in the pad, had a metallic finish,  so I decided those would be perfect for this last card. 
Now, if you changed the papers on any of the cards I showed you today, they could be transformed into simple "gal" cards instead of "guy" ones!  Wow, that is a thought, isn't it?
 
I am off today to go to the scrapbook convention with friends.  I will let you know how it was when I see you tomorrow for the share card.  

Happy Stamping!
Tina


Monday, June 15, 2015

Birthday Cake Shaker!

Hello!  I am back today with another shaker card.  Yes, another shaker!  I am having so much fun with these, I just don't want to stop making them.  I decided to make one with a big three tiered cake with three separate shaker holes.  This one I made for my granddaughter who turned sweet 16 yesterday!  I have a couple of behind the scenes look at how I did it, but first let me show you the finished cake card, inside and out! (Oh, one more thing, I asked her what her favorite colors were and she told me red and black ...)  Enjoy!


The Front!


And the inside.  I tucked in her birthday money in the vertical DP strip.
To create the holes for the cake, I used 3 spellbinders dies ...

 
One note here ... I used some washi tape to hold my dies in place, but when I tried to remove them it took the paper too!  Yuk!  By the way, these dies cut not only the DP but also the fun foam underneath.  Die cutting fun foam is the best thing in the world and that is why I like shaker cards so much! Next photo shows the different colors in the holes ...


The paper I used on the front with the hearts came from an Echo Park pad called Yours Truly and it was the only heart piece left in the pad.  I realized too late that maybe I should have placed the die cuts closer together.  I really wanted to use the heart DP, so I made it work.  I think a thinner scallop die between each of the rectangles would have looked better on the front, but I had to go with the wider one with the spacing that I did.  All in all, I like the way it came out.

Funny thing, is a friend of mine told me about a great place to order sequins called Cartwrights.  I had just got my order in the mail and was hoping to use some of the bright colors I got, but then my granddaughter told me red and black were her colors, and so ... that means ... there are more shaker cards in my future so I can use these ...


See you soon!
Happy Stamping!
Tina

Saturday, June 13, 2015

Saturday's Sketch Share!

Hello!  I am back today with my weekly share between Debbie and I.  I will show you my card first, then Debbie's and the sketch we both used.  Enjoy!


My Card


Debbie's Card

The Sketch
Okay, at first glance, I thought this sketch was on the simple side, but then again they are days when a simple one is just what you need to get that needed card made!  One of the papers in my new 6" pad, had images of swimsuits, so I had to do this fun image to match.  Love the sentiment on Debbie's card.  I love all those puns!  What do you think of this week's cards?

I didn't have a lot going on this week, which should have been a perfect time to make a bunch of cards to add to the ones I am hoping to sell, but I didn't do it.  I do however, make a really fun card for my granddaughter for her 16th birthday, but I will wait until Monday to show it to you, so that I make sure she gets it first. 

Happy Stamping!
Tina

Tuesday, June 9, 2015

Grad Shaker Cards!

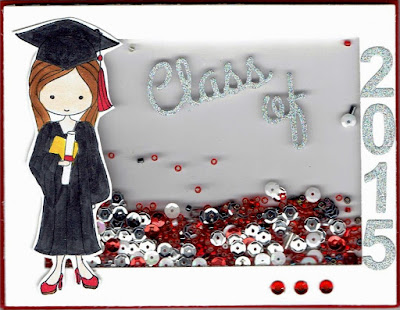
Hello!  I guess since I just taught that fun shaker card class, I have shaker cards on the brain.  Truthfully, the first grad card I needed, I used a frame that was sitting on my desk, as it was a discard from when I was first coming up with my class cards, and then the second grad card, I used a frame I had made for the class to show them how to layer the pieces.  I liked the second card so much, I decided to just keep it going and make another frame the same size as the second one.  The shaker cards are a fun idea, especially since it is a celebration.  For all three, I matched the color theme with their school colors.  Here are the three cards.  Enjoy!

First, the only "guy" one, this one with the smaller frame...

 
 And the inside, with a pocket to hold "the moola"!

The next two are for the gals.  Both are the same layout but have different colors ...


I forgot to take a photo of the second one.  Pretty much the same except it had no pocket, because I had a wrapped gift for her instead of cash.  I want to say thank you to two friends for letting me borrow their stuff, first Virginia, as she had bought at the store this awesome die of the grad hat. (I should have bought it too, but I wasn't thinking that I needed it ... well, duh!).  Also, my friend, Eileen for letting me borrow the grad girl by Taylored Expressions.  It made for perfect high school grad cards!  What do you think?  Fun, shakin' goin' on??

Happy Stamping!
Tina


Monday, June 8, 2015

June Class Share!

Hello!  Early in the year, I had asked Carolyn at The Crafty Scrapper to order me some floral stamps, matching dies, and a pop-up die from Stampendous, thinking they would make for a  perfect class!  Well, she got in the dies a couple of months ago, but the stamps got backordered.  They finally came in and I knew that they would become my June class.  Here are the cards I am teaching ...enjoy!

First one, showing the inside first with the awesome pop-up ...

 
And here is the front of the card ...


I have done flower pot cards before, but it has been a while, and I have been wanting to do another, so we are ...


 And here is the inner card pulled out of the flower pot ...


One note on this one, is that the napkin shape on the flower pot, is a die from the pop-up die set.  Love it!
 
The last one uses the rose blooms stamp, but this time paper pieced.  And this one is a step card with a hidden message pull-out.
 
 
And, a side view ...


And, the pull-out tag to write your message on ...


Here are the details if you are interested in either coming to the class or would like a kit.  I have quite a number of ladies that get a kit, some even live in another state.  If you are local, you need to sign up at the store either by calling them at 972-923-3151 or signing up thru their website
 
Build A Bouquet!  Wed. June 24th 11:00 a.m. and Sat. June 27th 2:30 p.m. $28
 
Come make three floral cards all using the Build A Bouquet stamps and die sets from Stampendous.  First, is a card using their pop-up die set, that will wow the recipient when opened.  Next, you will make a flower pot card, which is an old favorite of mine, and lastly, a step card.  You will fall in love with these new flower stamps and die sets, just like I did!  Please bring adhesive to include scor-tape (any size), small pop-ups, detailed scissors, and your preferred coloring medium.  All other supplies provided.  (Copics list, for those who want to know what colors I used: Card 1: CO, B000, BG000/BG11, R02/R14, RV32/RV95/RV69, Y06, YG17/G28, Card 2: R05, Y17, BV04, Y15, YG23/YG17, Card 3: R000, R11/R20, G43/G46, E44)
 
I hope you enjoyed my class share!
Happy Stamping!
Tina


Saturday, June 6, 2015

Saturday Sketch Share!

Hello!  Look I am on time for the share! ( Hopefully, that makes up for me being late on a grad card I promised you earlier in the week.)  This has been a busy week!  I did 4 cards for a design team post that you will see sometime, I made two of the Saturday cards, and I finished my June class samples, which I will show you tomorrow.  I also helped out 4 days at church for Vacation Bible School, which I got volunteered for crafts two of those days.  Let's get to today's share because I love today's cards and the sketch!  I will show you my card, Debbie's card, and the sketch we both used!  Enjoy!


My Card


Debbie's Card


The Sketch
Debbie said we she saw the sketch, it just screamed shaker card!  That is so true, makes me wish I would have made mine that way!  I have been doing a lot of shaker cards lately and loving them!  Aren't both of the cards, just too fun?  This sketch is a keeper, for sure!

Hopefully ,,, I will get all my photos taken of my class cards, and will have them to show you tomorrow!

Happy Stamping!
Tina

Tuesday, June 2, 2015

Saturday's Sketch Share (On a Tuesday!)

Hello!  Yes, I put you off last Saturday, finished my card yesterday, finally, but then forgot, to get it on the computer.  So, now it is Tuesday .... I have my card, Debbie's card, and the sketch we both used.  Enjoy!


My Card


Debbie's Card

The Sketch
I thought this one was kinda hard.  I think Debbie had the right idea in just using DP for the two smaller squares, instead of what I tried to do by putting an image there, as it kinda got covered up by the sentiment panel.  What do you think of this week's cards and sketch?

When I did my card for yesterday, I also did this week's card, so I will NOT be late this Saturday.  Tomorrow, I will be back with a grad card I made for the grandson.

Happy Stamping!
Tina

 
design by suckmylolly.com