Hello! Last weekend I was feeling overwhelmed because I had made my
cards, but that was all! Well, I have to say I am much better now!
This week I accomplished a lot including decorating the house, getting
our tree and decorating it, wrapping the few gifts I have, and making
the gift card holders that we put money in to give to the
grandchildren. In my last class at The Crafty Scrapper, we made 5 tags
and this box card gift holder. I knew as I was prepping for the class,
that I would be making four more of these for the grandchildren. As it
turned out, I had four kits left from my class, so I went with the red
base for all of them, since the cardstock was already pre-scored and
ready to be made into the boxes. Let me show you how they came out and
then I will be giving you a little tutorial on how to make these. They
are impressive when they are put together, but so easy to make! Enjoy!

 |
| Close Up #1 |
 |
| Inside panel with pocket |
 |
| Close up #2 |
 |
| Close Up #3 |
 |
| Close-up #4 |
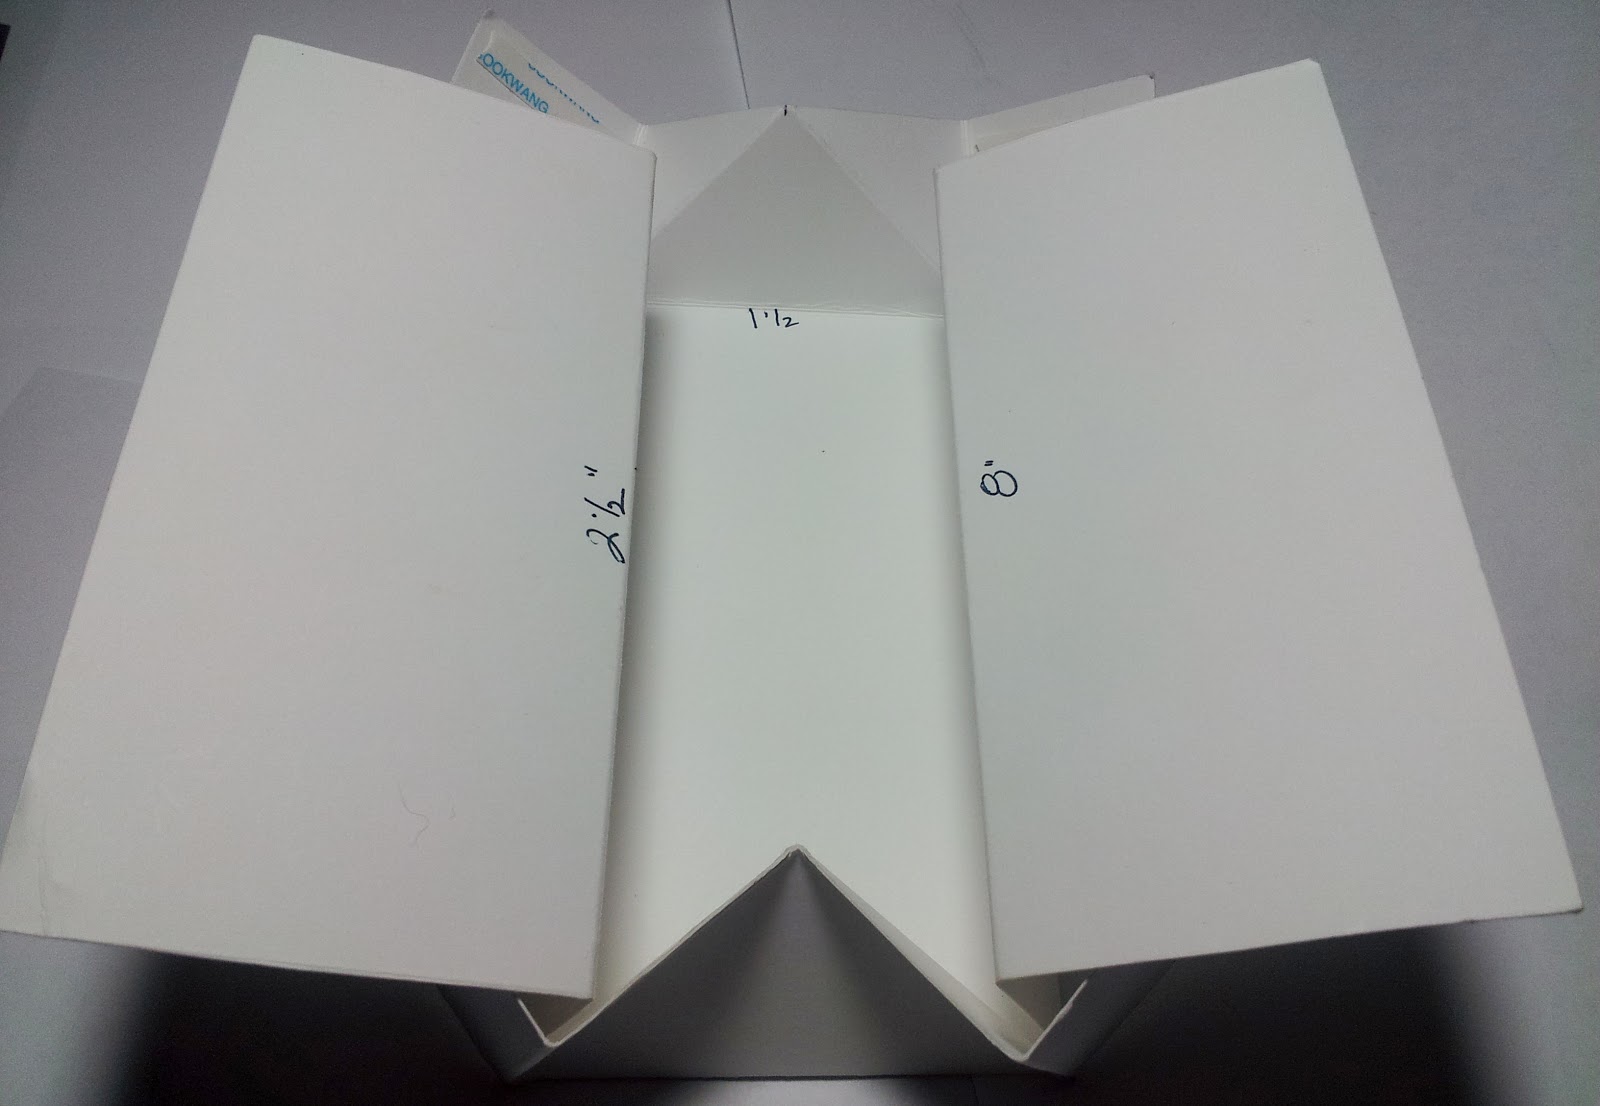
You start with a 8 ½ x 11 inch piece of cardstock. In the horizontal direction, score at 2 ½”, 4”, 7”, 8 ½”. In the vertical direction, score at 1 ½” on either end. Make a mark in the middle of the cardstock at 5 ½”. Next, you will need to create the diagonals by either using a score board or bone folder and a ruler. You will need to score from the mark you made to the 4” and one to the 7” only down to the 1 ½” line. Do this on both sides. Now, make a cut on your score line up to the 4” score line. Do this on all 4 sides. And then cut off the first rectangle (they measure 1 ½ x 2). Again, all 4 sides. Now, the most important part is to make sure those diagonals are mountain folds, and the other score lines are valley folds, well except for the two front flaps that will form your card, they are mountain folds too. You want your lines to be scored very well to create your box. You can see in the visual pic below, the scored lines, the folding, and the cut off pieces.

As you fold, the diagonals will create the box and the two flaps (on either side) will get adhered (I have score tape on these flaps in the above pic) under the front flaps The next pic shows how it looks as it is being folded up.
It is times like this, that I wish I had a setup to make a you tube video, so that you could have a full visual! Maybe that is something I should look into? But for now, if you have any questions, or need any help at all making these box cards, just send me an email. I will be glad to help!
My granddaughter who is 13 asked me to make a card for her to send to a friend. I did it and so tomorrow I will show you that one and then Saturday, I will have the weekly sketch share. See you then!
Happy Stamping!
Tina
My granddaughter who is 13 asked me to make a card for her to send to a friend. I did it and so tomorrow I will show you that one and then Saturday, I will have the weekly sketch share. See you then!
Happy Stamping!
Tina

0 comments:
Post a Comment