Monday, March 31, 2014

Go Forth and Eat Cake!

Hello!  I almost forgot that I promised I would have one more card for you for this month.  I have quite a number of stamps in my stash that I got that haven't been inked up yet and was happy when I got to get ink to this one!  A fun birthday card ... enjoy!

 
I have a couple more cards with stamps also by The Cat's Pajamas to share with your tomorrow!

Happy Stamping!

Tina

Sunday, March 30, 2014

Sunday Words of Wisdom!

Hello!  Here is my pick for this week ... enjoy!


See you tomorrow for my last card for this month!
Happy Stamping!
Tina

Saturday, March 29, 2014

Saturday's Sketch Share!

Hello!  I back with this week's share between Debbie and I.  This week is the week that we had a choice of circle or square.  We both went with the square choice!  Let's get right to it.  I will show you my card, Debbie's card and the sketch we both used.  Enjoy!


My Card

Debbie's Card


The Sketch
Debbie and I both agreed that this is a super easy sketch and for a square card, it is definitely a "go to"!  Even though it was super easy, I had trouble with mine ... first finding the right color cardstock to match my papers I had already picked out and then next the right ribbon.  As you can see, I went with basic white, but I decided it was the best choice.  I love the colors of Debbie's card, so bright!  Oh, one more note on mine ... the "Happy Spring" sentiment is a very old stamp and for any of you that have been doing stamping for as long as I, you will remember the brand Personal Stamp Exchange!  I also want to make note that we now have gone through all of the 2012 Mojo Monday's sketches and next week we will begin the 2013 sketches! 

A couple of days ago, I showed you my make it take it that I will be doing for The Crafty Scrapper's big event in a couple of weeks.  They now have on their blog here all the details for the upcoming day including showing some of the make in takes.  Check it out. 

I am off to teach today my second class of the week.  Funny thing ... a week ago when I was starting to prep, I decided to make my max number of kits (20) so that I would end up with probably 4 or 5 kits left for me to finish so I would be ahead on my Easter cards.  What's that saying ... not over to the fat lady sings ... well, I must be singing because I sold ALL the kits!  Surprised, but happy about the extra money that will be going to the credit card!  I buy too much stamping stuff ... you don't do that too, do you??

Happy Stamping!
Tina


Friday, March 28, 2014

Welcome Baby Boy!

Hello!  Did I tell you I am a new Grand God-mother?  Is there really such a person ...if there is, then that would be me!  I am the God-mother of my friend, Donna's son and so now he and his wife have a brand new baby boy!  Let me get to my card.  I think it is so adorable, and I know you will too!  Enjoy!
 

Told you it was cute!  I love how all the guys are lined up welcoming Max!  But, what is a cute baby card with out cute baby pictures, so here are the many faces of Max!  (stolen from his daddy's facebook page) Too cute not to share!  


Recipe:

Paper - Dots & Checks - one sheet/opposite sides from Jillibean Soup, Blue Plaid from Studio G, Cardstock White, Blue, Brown
Stamps - Verve To The Moon Set
Ink - Memento Black, Copics
Tools - My Favorite Things Pennant Die-namics
Other - Twine from The Twinery, Blue Rhinestones

Here is a photo of Ryan and Max ...


See you tomorrow for the share!
Happy Stamping!

Tina

Thursday, March 27, 2014

Make It Take It Sample Share!

Hello!  Well, worse than not making any new creations to share with you, is making them and then not show them to you!  But, my "excuse" this week is that I was class prepping!  Anyway, I promised to share what I came up with for my make in take for The Crafty's Scrapper big event.  It really is a great deal, as you get to do as many as 10 different types of projects for just one price of $20!  I decided on the Never Ending die from Inky Antics, along with an envelope made with the We R Memory Keepers punch board, and of course, stamps.  Pretty simple, but something to learn and a couple of nice ticket items for the store to possibly sell.  Yes, I guess  I would think of that, since I was a store owner!  Let me show you ... enjoy!


And the next 3 photos are how it will look when they are folded in the next direction, and the next, and the next, and then it is back to the first ...


See you tomorrow! 
Happy Stamping!
Tina

Monday, March 24, 2014

Baseball Slugger!

Hello!  Before I show you my card, I need to give you the low down on why I made this card.  We have a favorite Italian food restaurant near where we live and about a month ago, the manager was saying she needed a card for a friend that is going to be inducted into the baseball hall of fame.  I told her I would make her a card.  I knew that I didn't have any baseball stamps, so I looked on the internet, and found a great set for only $10, and thinking that this wasn't much to spend even if it didn't work out for her liking or wanting my card.  So, now the card is made and I have left it for the manager.  Hope she likes it and I hope you do too ... enjoy!


Don't be shocked ... I made my own background paper!  In this set of stamps, there were all these sentiments like "Baseball is my game", "I know baseball and baseball knows me", "Baseball Rocks", "Slugger", "Baseball Rocks", and "Play hard or go home".  So, I just made a panel of them.  The guy played for the Tennessee Titans so, that is the card colors.  What do you think?  Oh, and now I have a baseball set of stamps, if anyone is interested!  Let me know, I can pass them along to you for a bargain!

Recipe:
Paper - Cardstock White, Red, Dark Blue, Med. Blue
Stamps - Hampton Arts, Inside sentiment Hero Arts
Ink - Versafine Black
Tools - Darice Stars embossing folder, Spellbinders Classic Circle, Pinking Circle
Other - Rhinestones (their shape reminded me of a baseball diamond?)


Happy Stamping!
Tina

Sunday, March 23, 2014

Sunday Words of Wisdom!

Hello!  Got up early and went straight to class prepping.  You see my stepson and step- granddaughter that have been living with us for the last three months will be moving into their new house that they just closed on late last week.  I know I want to help some with that the next couple of days, so that means I have to get my class prepped.  I was out in my shack just working away, and it popped in my head that I had not put my weekly Sunday post on my blog.  Came in for a break and made the one below my pick of the week ... enjoy!


Happy Stamping!
Tina


Saturday, March 22, 2014

Saturday's Sketch Share!

Hello!  I have two posts for you today, this one and a copy of the one that is on The Crafty Scrapper's blog today, so after you look at this post, make sure you scroll down to see the second one!  Let's get to the share!  I will be showing you my card, Debbie's card and the sketch we both used.  It is a must have, go to sketch ... at least, I think so, you can be the judge ... enjoy!
 
 
My Card

Debbie's Card

The Sketch

The floral stamp I used is new to me.  I was dying to ink it up and when I saw the sketch, I thought it would be perfect!  The only thing is I couldn't decide on is what paper to go with.  I was cleaning out my paper tote from the last class I taught, and this paper was in there and again, I thought ...perfect.  Now, on Debbie's card, I have to share what she told me ... Debbie said she needed a card from her golden retriever, so this is what she came up with.  On the inside she had "I really messed up. I'm sorry".  So, I am curious, what did your puppy dog do?  He must be in trouble for something!?  Hee, Hee!  I love how both cards came out and I hope you do too!

Don't forget to scroll down to see my card I made for The Crafty Scrapper's blog.  And then come back tomorrow for the Sunday words of wisdom post!

Happy Stamping!
Tina

Springtime Bunny Hugs!

Hello!  I have two posts for you today.  This one, which is a copy of the one that is going live on The Crafty Scrapper's blog today.  And the second, which of course, is my weekly Saturday Sketch Share, which I have set up to post on my blog at 9:30 a.m., so make sure you don't miss that one.  The cards this week are awesome! 
 
 
Hello, it's Tina here again to share another card creation with you!
 
Springtime has arrived at The Crafty Scrapper!


I combined beautiful papers from Authentique's spring line called the Promise Collection with an adorable bunny stamp from Inky Antics, added in flowers, ribbon and a nice sketch to create my card.  All three flowers were cream until I colored two of them with my Copics!  And, I used an exacto knife on the bunny's arms to slide the flower stems through.  This is a super fun card that is perfect for spring but could also be sent year around.
 
You can find all the supplies and see this card in person at The Crafty Scrapper.
 
Happy Stamping!
Tina
 

Friday, March 21, 2014

Save the Date!

Hello!  I totally forgot to add this to my blog post this morning and I promised to share it ... so ....for those of you who are local, mark your calendars ...


Yes, I will be participating again.  As soon, as I figure out "what" I am doing, I will be sure to share it with you!

Happy Stamping!
Tina

In the Garden of Life!

Hello!  Time ... it is a crazy thing ... I got time a few days ago to create some cards, but then I haven't had time to write the blog posts and get them on here.  The good news is that I have enough made to show you one a day through the end of the month!  Woo Hoo!  So, let's get to today's card.  About a month ago, I made a fold over card out of one of the Spellbinders dies with some tape.  I talked about it in this post here.  For that card I used scor-tape but I wanted to try out the Crafty Power tape that was suggested.  Well, I got some of the tape and I think it does work better than the scor-tape, mainly because it is thinner.  I got some new flower stamps I was wanting to ink up, and putting the dies and the flowers together, this card was created ... enjoy!


Below shows the inside.  You can see it looks like there is a fold, the score-line is actually on the bottom die shape (the same one you add the adhesive to).  Here is the link again that shows how to make these cards.
 
I see I used the same sentiment as I did on the card I linked back to, and that is because it is a great card for friends with flowers on their card!  I, as always, like to have a sentiment somewhere on the front of the card, but I did not want to cover up too much of the flowers, so I went with vellum and embossed the sentiment in black.  Love how it came out.  I gave the card to a friend from church.  She loved it!  Now when I see cards on the internet where they are creating the fold overs with decorative dies, I can make them with no problems!  That makes me very happy! 

Recipe:
Paper - My Minds Eye Memorable, Cardstock Natural White, Clear Vellum
Stamps - Flourishes Sweet Nature set, Outside sentiment from Rubbernecker Sketch Poppies set, Inside sentiment from DeNami Designs
Ink - Memento Black, Copics, Versafine Black, Clear embossing powder from Judi-Kins
Tools - Spellbinders Timeless Rectangles (2 sizes), Framed Tags 2
Other -
Scrapbook Adhesives Crafty Power Tape (this link shows what the tape looks like, not where I got it from)

Tomorrow I will have the sketch share and a copy of the blog post that will be on The Crafty Scrapper's blog.  So, look for both of them!

Happy Stamping!
Tina

Sunday, March 16, 2014

Sunday Words of Wisdom!

Hello!  Here is my pick for the day ...

Happy Stamping!
Tina

Saturday, March 15, 2014

Saturday's Sketch Share!

Hello!  I really hoped to see you before now, but we have been really busy with family here.  I do have the Saturday share for you today between Debbie and I.  We have to get right to it, because we are on our way to the granddaughter's softball game.  I will show you my card, Debbie's card, and the sketch we both used.  Enjoy!

 
My Card

Debbie's Card

The Sketch
I guess I had bunnies on the brain since making my Easter card samples.  And, you can see my card is pretty much like the sketch, since I kept the hearts.  Debbie's card really shows a good interpretation on the sketch.  In any sketch, where there is a shape, you should just know that is where something should go, and that it does not, like in this case, need to be a heart!  That's my lowdown on doing sketches!  How do you like them?  What is your favorite?

Happy Stamping!
Tina

Tuesday, March 11, 2014

I Love You More Than...!

Hello!  I am back today with the card I made for my hubby for our anniversary.  When I saw this card here, last year sometime, I knew I had to own this die.  I got it but I had never got around to using it.  I decided this was the perfect opportunity.  The sentiment they used on the card is from a stamp set, but I wanted to change it because I needed it to say something a little different to make it "perfect" for us, so I printed the new sentiment out on the computer.  You see, my hubby loves hamburgers.  He could eat one at EVERY meal, but me?  Never, it is just not something I like.  So ... let me show you my card ... enjoy!


I like how it came out.  I used a different layout than the one I cased, but her sample sold me on the set and gave the idea on how to assemble the hamburger pieces.  One note, Gary doesn't like cheese on his burgers, but I needed the cheese triangles to add color to this hamburger card!  I couldn't find a Happy Anniversary stamp in my stash, so I printed the inside too!  


Recipe:

Paper - Simple Stories Homespun 6 x 6 pad, Cardstock Kraft, Green, White
Stamps - None (shhh...don't tell the stamping police!  Hee, Hee!)

Tools - Your Next Stamp Fast Food Burger die, Spellbinders Classic Circles, Cuttlebug Hearts embossing folder
Other - Rhinestones

Now, that the class card samples are done (if you missed it, I did a post to show you late Sunday, look for it), I still have a couple of cards I have in my head to make and I hope to get to those soon.  

Happy Stamping!
Tina

Sunday, March 9, 2014

March Class Share!

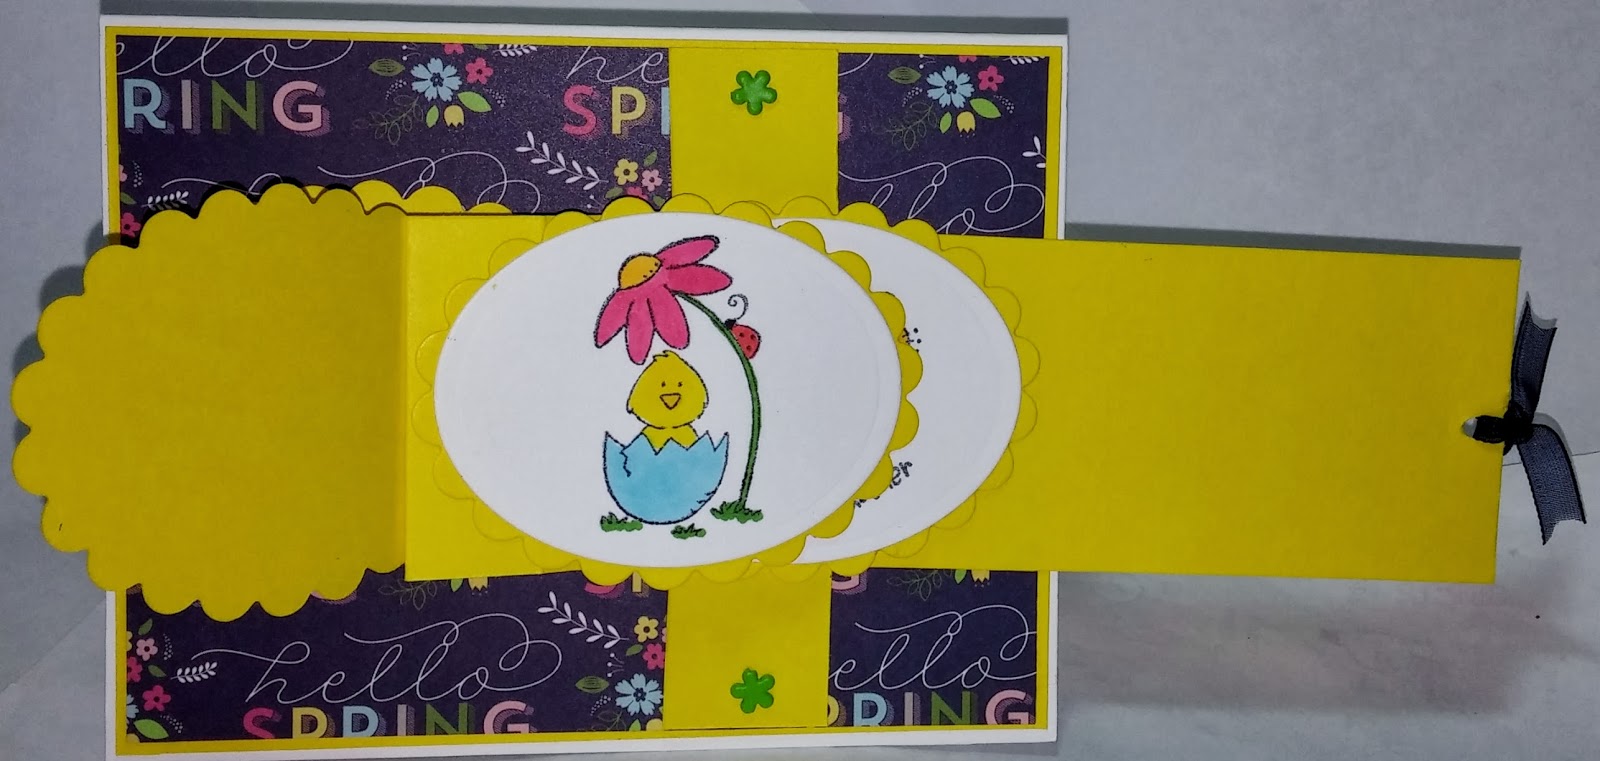
Hello!  I said I would be back this afternoon ... well, it is now 8 p.m.!  At least it is still Sunday, right?  I wanted to get these class cards posted here to show you.  This is my Easter class and all three cards came out wonderful.  Let me show you  ... enjoy!  (Warning: I have lots of photos!)

First up, is a step card.  The coolest thing about this card is the Easter basket that is made with the Card Loom die! 

The next photo shows a side ways look so you can see the "step" detail ...


And the inside ...
Next, I used a stamp set from Penny Black with a bunch of adorable chick images.  So, that I could use more than one image, I did a waterfall card.  And a variation of what you normally see, as it is in shapes and pulls from the side ...

Pulled once ...

Pulled twice ...

Pulled three times ...
And then the foldover inside looks like this ... (p.s. now you see why I turned it ...love the inside image!)

And last but not least, a religious card, using a favorite cross stamp.  This one is called an Upright Z-Fold card ...
Here is a side view ...
Here it is open with the inside message and also a place to write your message ...

And one last look with it partially opened ...


Here are the class details in case you can come or would like a kit ...(Just let me know or call The Crafty Scrapper (972-923-3151).

Easter Creations 2014 - Wed. March 26th 11:00 a.m. and Sat. March 29th 2:30 p.m. $25
Come get creative with three unique and fun cards just in time for Easter.  Continuing our die of the month, this time we are using the Card Loom die from Inky Antics to help us create an  adorable Easter basket that is an integral part of this special step card.  The second card uses several darling images from Penny Black to create a waterfall card variation.  And last but not least, an upright Z fold card is made to showcase a religious cross card. 
Please bring adhesive to include score tape, pop-up dots, detailed scissors, and your preferred coloring medium.  All other supplies provided.  (Copics used: card 1: C1, R20, R22, BG11, BG13, YG17 card 2: Y08, Y17, Y06, YG17, RV32, RV14, BG01, E41, E43, R2 card 3: YG63, YG93, E40, R81, YG91, these are listed only for those that have asked for them).

I will be back in a couple of days with the card I made for my hubby for our anniversary.


Happy Stamping!
Tina

Sunday Words of Wisdom!

Hello!  Since last night was the "spring forward" time change, I went looking for something related to that and this is what I decided on ... enjoy!


And this ...

Not a sentiment, but oh, so pretty!

I finished my class card samples last night ... woo hoo!  So, later today, I will take my pictures of them and I will have a post for you for show and tell!

Happy Stamping!
Tina


Saturday, March 8, 2014

Saturday's Sketch Share!

Hello!  I am back with another share between Debbie and I.  Let's get right to it ... especially since I am a little late today!  I will show you my card, Debbie's card, and the sketch we both used.  Enjoy!

My Card

Debbie's Card

The Sketch


What do you think of today's sketch?  I think we both liked it.  I did have a little trouble getting all my layers to lay correctly, but other than that, I think it went together really well.  That bee paper with the honeycomb on the backside is some new paper from American Crafts that I just bought that I had to use.  Benton bear with his hive was a perfect match!  Did you like how I added the sentiment on those little flags and in the place where the bow should be?  This was my favorite part!  

I am almost finished with my class cards ... I have two done, one to go ... the first two, especially the first one, are adorable.  So, as soon as I get them finished I will do a post here to show you.  Later today?  I hope so but we'll see how it goes!  Tomorrow I will have the Sunday words of wisdom post for you too.

Happy Stamping!
Tina

Wednesday, March 5, 2014

I'm Glad There is You!

Hello!  Sunday it sleeted big time and it has been very cold, so I haven't been out to my shack to work on what I should be working on ... like the sketch share card, my class samples, and lots of other cards I want to make time for.  This morning I was looking around on facebook and I see my card post on The Crafty Scrapper's blog!  I forgot all about it.  So, I do you have a card for you today ...yipee!  Here is the copied post ... enjoy!
 

Hello, it is Tina here to bring you another card creation using wonderful products from The Crafty Scrapper!


I was thinking springtime when I saw these pretty papers from Authentique!  I decided to make one of my favorite card sketches, combining it with a sentiment stamp from Inky Antics and an awesome two part butterfly die set from Elizabeth Craftts.  And, instead of adding plain ribbon, I added that floral fabric ribbon border.  Yes, it was white and I colored it with my Copics to match the papers!
Love how this one came out.  I hope you do too!

All the supplies can be found or ordered at The Crafty Scrapper!
Happy Stamping!
Tina

Sunday, March 2, 2014

Sunday Words of Wisdom!

Hello!  Here is my quote for the day ... enjoy!


Happy Stamping!
Tina

Saturday, March 1, 2014

Saturday's Sketch Share!

Hello!  I am back today with this week's share between Debbie and I.  Let's get right to it.  I will show you my card, Debbie's card, and the sketch we both used.  Enjoy!

My Card

Debbie's Card

The Sketch
What do you think?  Now, that I can see both of them together, I think I like them both.  But, I tell you, I wasn't so sure when I was working on mine.  And I think Debbie said the same thing!  On Tuesday night, after finishing my class kits, I decided to do my card and went looking for something that had not been inked yet, but that had two to three elements plus a sentiment.  Fitting that bill was the socks and sentiment from a clear set from Avocado Arts.  And, so I didn't have to go thru all my papers, I just went with the Pebbles set that I have been using lately!  Speaking of papers ...oh, my ... I love the background paper that Debbie used.  Also, don't you love how each of the two strips has been embossed?  What an awesome idea!  

FYI ... remember the garage sale at the store that I tried to sell my ex-Imprints stuff at ... I found out my portion of what was sold was only $28.80!  That is even worse than last year, and I thought last year was bad.  Silly me, I brought the big box home, before I remembered, I was going to donate it and be done with it.  So, I guess I can try one more time, the next time!

I am off to teach today!  Today is one more day of pretty weather ... tommorrow it turns very cold again.  Hopefully, this will be our last cold spell, as many of the trees are budding and ready for Spring!  (Like me!)


See you tomorrow for the Sunday words of wisdom post!
Happy Stamping!
Tina

 
design by suckmylolly.com