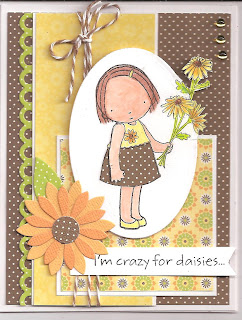
Hello! So, much for me being back on Wednesday or Thursday! I always have good intentions but it seems that life gets in the way sometimes! On Tuesday, after I finished the class cards and sent the email to the store owner, I did get back out to my room and got the Saturday sketch card completed so I could get that one in the mail and I started a card, just the base, thinking I would finish it up on Wednesday. Well, Wednesday rolls around and I decide that I should go see my mom at the nursing home and I could go to my room afterwards. Well, I think the visit just sucked the creativity right out of me. I did wake my mom up from a nap, so that's part of the confusion, but even so, she did not know me. In fact, she argued with me when I told her I was her daughter, Tina. She wanted to know where Agnes was? Agnes? Who's that? Oh, I find out she's my sister! Yea, right! Anyway, sorry to vent here, but I do appreciate it. Now it is Thursday, and the idea for the card base I no longer like, but I know I need to add something to the size ovals that I have already die cutted out. I decide to go with an old favorite! As I was starting to cut out my bunny, I thought about that I have never given you the instructions on what is called the "outside the box technique". I taught it in my last class but I have not shared it here on the blog so that is what you are getting from me today! First, here is my finished card. Enjoy!
Old favorite, or not ... I love this card. Actually, it is more like old meets new, because the daisy dies are pretty new and the paper pad is very new! One more thing, I have always made the squares Flopsey is holding to look like presents so I could paper piece them. I decided I wanted to go with the cake instead and still paper piece them. Adding the candles makes it look like a cake, paper piecing and all! Cool! O.k., let me give you the recipe and then I will get to the tutorial.
Recipe:
Paper - My Minds Eye Lime Twist Happy Go Lucky 6 x6 Pad, Cardstock Pink, White, Olive Green
Stamps - Birthday Flopsey by My Favorite Things
Ink - Versafine Black, Prismacolor Pencils, Gamsol, Buttercup Stickles for the flames
Tools - Classic Oval, Classic Scalloped Oval Nestibilities, My Favorite Things Die-namics Upsy Daisy set
Other - Pearls by Kaisercraft
Tools - Classic Oval, Classic Scalloped Oval Nestibilities, My Favorite Things Die-namics Upsy Daisy set
Other - Pearls by Kaisercraft
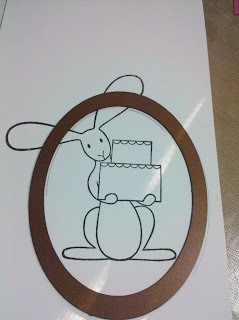
 Here is another look at the class card I am talking about where I taught this tutorial. Do you see on the right hand side how the flowers look like they are coming out of the die. The technique was perfect for this stamp because it would have been difficult to cut around all of the intricate daisies. By doing the "out of the box" technique, I only had to do the intricate cuts on one of the daisies! But, for ease of showing you how to do it, I will show you with the bunny from today's card.
Step 1: Stamp and place the nestibilities die on top.

Step 2: With a pencil, trace around outside of the die, especially in the area that is going to be "outside" (in this case, the ears) You will also need to lightly mark a line on the inside of the die, above and below the portion that will be "outside" (again in this case, above and below the ears). I think you can see my pencil marks in the pic below.
Step 3: Remove the die. With a sharp pair of scissors, cut from the edge of your paper a little farther in than the inner line you drew above and below "the ears". And then cut, around the ears ONLY up to the outside lines.
Step: 4: Place the die into position, with the cutting edge down, using your outside pencil marks as a guide. When you slide the die into place, lift the section that will be outside so that it lays above the die. This will keep it from being cut off when you run it thru your die machine. See the pic below.
Step 5: After you run it thru your machine, remove the die, erase your pencil marks and do any additional trimming. The pic below is before the pencils marks are erased but you can see that the ears are still in tact but look like they are "outside of the box".
That's it! It is really not so hard once you get the hang of it! I would suggest you try it first on something similar to the bunny so you don't have to worry about too much cutting the first time. I hope this tutorial was helpful and please email me if you have any questions.
I will be back tomorrow with Saturday's sketch challenge, see you then!
Happy Stamping!
Tina


0 comments:
Post a Comment