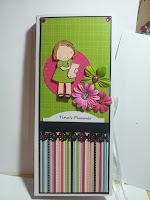
Hello! Remember I told you I was working on a little project for my stamping friends that I meet once a month? I was able to give them out last Friday and I think they all liked them. They knew I was making something, but they didn't know what! Last year, in January, I made desk calendars for all of the girls. They were all the same design, but all 8 (that is 7, plus one for me ... couldn't leave myself out!), used different papers. The little calendar pages I got from Dollar General last year, so ... this year, I was off to find the new 2012 calendar pages, so we could continue using our desk calendars. And right next to them, were these really colorful "to do lists", and a light bulb came on! I bought 8 of them, immediately thinking about making some kind of planner. But, then when I was thinking about what stamps to use, I really wanted to use the same Pure Innocence girl I used on the 2011 desk planners, but I didn't know if I should, and then ... another light bulb moment! I decided I would get the girls to tell me which calendar I made for them and I would make a companion piece with the same papers for each, well, as much as possible. After all, it has been almost a year. But, you know what? I was able to find enough to make them all work. That just goes to show you how far one scrapbook piece of paper can go! There are a lot of pics to show each one, but, well, here goes, I am doing it anyway. If it seems repetitive, just scroll down because I do have a few pics on how they came together toward the end. Enjoy!

For the last group, I don't have a pic of the original desk planner to show you. My friend sent me a copy of it, but it doesn't show up that good, but with all the others, I know you get the idea! Speaking of the last group, can you believe how good the store bought list pad goes with the scrapbook paper colors? That happened again on the group right above this one. I was almost to the making of the last planner before I realized I should be showing you some pics of the steps I took to make one. So, as I was making the last one, which is actually, the 2nd to last grouping shown above, I took a few pics to give you some insight!
 This pic shows how I scored a strip to hold the pen (also got at Dollar General!), and added red liner tape on the edge of each score line. By the way, the planner is 9 x 8 1/2 inches. With the scoring on the 8 1/2 inch length.
 I added a pretty heavy piece of chipboard to the backside of the memo pad, again with the red line tape.
 Adding more red line tape to secure it to the inside right panel of the planner. On the left panel side, I added a piece of white cardstock so that side would appear more finished. On top of that is where the panels with the pockets are that you see in the group of pics.
 I punched with a Martha Stewart floral border punch and trimmed these pieces down to 1 inch total to be added to the top of the inside pockets as well, as the top of the bottom panel on the front.
 This shows how the inside pockets were made. Yes, I used Foam Tape! The scotch tape you see in the pic is how I attached the above strip to the stripe panel, as I wanted it to be just at the top of the panel.
 I got the original idea here. But, I changed mine so that I could have two pockets instead of one, and mine would hold a pen. I have to say, they were not difficult at all to make, and when I got to the adding the flowers and the baubles, I was in pure heaven!
Thanks for sticking with me in enduring such a long blog post. I will be back tomorrow to show you a new Christmas card creation that I worked on yesterday. Which is good, but bad too, because I should be working on the kits for my Treat & Tag class that I have to have ready by Wed.! Yikes ... better get to it!
Happy Stamping!
Tina


0 comments:
Post a Comment